
The 'Weight Map' texture allows users to assign certain vertex Maps for use in the Shader Tree. Specifically vertex RGBA Color Maps and vertex Weight Maps. Vertex Maps when used in this way can provide interesting options for shading a model as they are resolution independent and can provide a variety of effects with much less system overhead than similar bit-mapped textures. Additionally, the information is embedded into the model and requires no additional external files, making them highly portable.
Usage
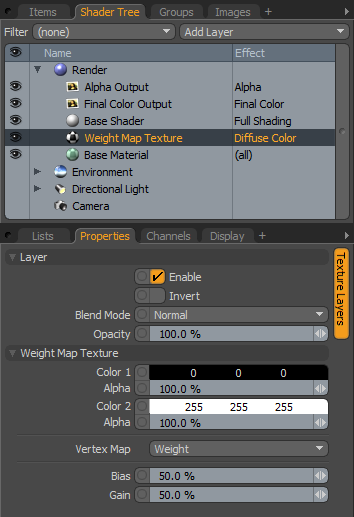
Vertex Color Maps will need to be created for the target geometry first, which embeds the information into the vertices. Maps are first generated for a Mesh item in the 'Lists' viewport; when selected, the resulting vertex Map can be painted using the MODO's vertex painting brushes. Vertex Color Maps can also be generated automatically based on the scenes current surfacing and lighting using the "Vertex Illumination Baking" command. Once the Map is created as desired, users can add the 'Weight Map Texture' layer to the Shader Tree using the 'Add Layer' control (Processing > Vertex Weight Map). For information regarding adding and working with Shader Tree Items Layers, please reference the Shader Tree page of the documentation. In the resulting Weight Map Texture layer, users can then select the appropriate RGBA Vertex Color Map from the 'Vertex Map' list menu. Note that the best results will be obtained using a layer 'Effect' that requires color information. When using a RGBA Vertex Color Map the 'Value', 'Color' and 'Alpha' options will have no affect on the Map.
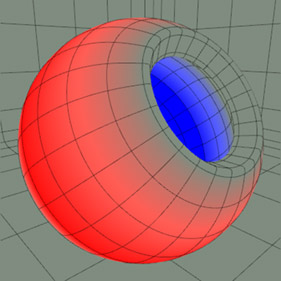
For Vertex Weight Maps, these will need to be created as well; this can be done using the same vertex painting brushes, but the brushes will assign Weight Values instead of colors. Users can also automatically create vertex Weight Maps with the "Vertex Curvature Baking" command, which may be used to produce some interesting effects. Once the Map is created as desired, users can add the 'Weight Map Texture' layer to the Shader Tree using the 'Add Layer' control. In the resulting Weight Map Texture layer, users can then select the appropriate Vertex Weight Map from the 'Vertex Map' list menu. Depending on the type of 'Effect' chosen, users can then adjust the 'Value', 'Color' and 'Alpha' options to produce the desired look. Additionally, the 'Bias' and 'Gain' options will control the attenuation between the Weight Map values in the map. When using a layer effect that requires color values (such as 'Diffuse Color') users can assign colors to 'Color 1' and 'Color 2' where 'Color 1' will map to the 0 value areas of the Weight Map, and 'Color 2' will map to the 1 value areas of the Weight Map. Where the 'Effect' type require grayscale input (such as with a 'Layer or Group Mask'), users can adjust the 'Value1' and 'Value 2' inputs, where 'Value 1' maps to the 0 value areas of the Weight Map, and 'Value 2' will map to the 1 value areas of the Weight Map. When the Weight Map Texture item is selected, the following attributes are visible in the 'Properties' panel-
 Layer--
Enable: Toggles the effect of the layer on and off, duplicating the functionality of toggling visibility in the Shader Tree. When disabled, the layer has no effect on the shading of the scene. However, disabled layers are saved with the scene and are persistent across MODO sessions.
Invert: Inverts the weight values for the layer producing a negative effect.
Blend Mode: Affects blending between different layers of the same effect type, allowing user the ability to stack several layers for different effects. For more on blending, please reference the 'Blend Modes' page of the documentation.
Opacity: Changes the transparency of the current layer. Reducing this values will increasingly reveal lower layers in the shader tree if present, or dim the effect of the layer itself on the surface.
Weight Map Texture--
Color 1: Determines the color of the texture for Weight values of 0, ramping toward Color 2 based on the weight Map itself. This setting only applies to surfaces that require a color value. The 'Alpha' value determines the level of transparency for the Color 1 zone.
Value 1: Determines the value of the texture for Weight values of 0, ramping toward Value 2 based on the weight Map itself. This control is only active when the texture layers Effect is set to a non-color attribute.
Color 2: Determines the color of the texture for Weight values of '1'. This setting only applies to surfaces that require a color value. The 'Alpha' value determines the level of transparency for the Color 2 zone.
Value 2: Determines the value of the texture for Weight values of 1. This control is only active when the texture layers Effect is set to a non-color attribute.
Vertex Map: Users may use this drop down menu to choose an existing Weight Map or Vertex Color Map.
Bias: The bias control will cause the texture to favor either the primary or secondary value or color. By increasing the bias more of the Color/Value1 will appear while decreasing the number will force more of the Color/Value 2 into the gradient blend.
Gain: The Gain setting is similar to a contrast control that effects the falloff of the gradient ramp between the Color/Value 1 and Color/Value 2. Setting the Gain to 100% will create a very sharp contrast whereas setting the value to 0% would reduce the contrast between the two to almost imperceptible amount.

