
The Move sculpt tool simply grabs the mesh inside the brush and drags the surface in the direction of the mouse. The tool leverages screen orientation to derive the perpendicular axis for the move. For instance, if the 3D viewport is rotated such that you are looking directly downward at the surface, the resulting move effect would translate the mesh on the same XZ plane. If the intended result is to "lift" the surface, the 3D viewport should be rotated so that the tool is working at more of a perpendicular (glancing) angle to the surface of the mesh. Pressing the 'Ctrl' key down while using the tool will send the surface moving in the opposite direction that the mouse moves. Pressing 'Shift' while using the tool will enable the 'Smooth' function. The sculpt 'Move' tool can be found under the 'Paint' tab for the interface in the 'Sculpt' submenu of the toolbox. The tool can also be called from the menu bar under the "Texture > Sculpt Tools" menu. Additionally, the tool can be combined with the various 'Tips' as well as the 'Inks' and 'Nozzle' to further customize the way the brush affects the surface. When activated the following attributes are displayed in the Properties panel.
Sculpt: Move--
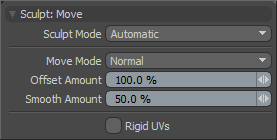 Sculpt Mode: The 'Sculpt Mode' determines which method of sculpting is to be used. By default the setting is 'Automatic' which will perform mesh based sculpts when there are no displacement images and automatically switch to image based sculpting when there an image is available. There are times when you may want to force MODO into mesh based sculpting even if you have an image applied for displacement. This can be very helpful for blocking out shapes and form, as mesh sculpting is only affecting the cage vertices of the base geometry.
Automatic-- chooses between mesh and image sculpting depending on availability of displacement image map texture.
Mesh-- forces the tools to perform mesh sculpting only.
Image Map (Details)-- forces the tools to perform image sculpting only.
Offset Amount: This percentage value modulates the strength of the move as a percentage of the mouse movement. At 100% the points will move the same distance as the mouse, at 50%, they points will only move half as far and so on. (Note: This is a very important value for controlling sculpted detail and as such it can be adjusted interactively by using the MMB+click and hauling left or right.)
Smooth Amount: The Smooth tool is such a useful method for controlling sculpt detail it is available with almost every sculpting tool in MODO and can be accessed by simply holding the Shift key down while sculpting. The Smooth amount attribute allows you to control the amount of smoothing applied when using the Shift qualifier with that specific tool. This is a convenience feature implemented specifically to enhance the sculpting workflow.
Rigid UVs: When using the sculpt tools to edit a UV map, the function of the move tool will attenuate based on the 'Tip' size and shape. By enabling the 'Rigid UVs' option, users can easily move entire UV islands as solid rigid pieces by simply moving the brush tip over an area and dragging.

