
When users choose a tool for sculpting and painting, it is also necessary to choose an appropriate brush 'Tip' which defines the way color or form is applied to the surface. By default, MODO will auto select the 'Smooth Brush' making it easier for users to just start painting or sculpting their surface. Users can easily select an alternate Tip form the selection available. Custom Tool and Tip combinations can also be saved using the 'Save Preset Brush' option found under the 'Brush Tips' icons section of the toolbox. When selected, each Tip has it own set of attributes covered below.
The Smooth Brush creates a nice feathered airbrush effect on the canvas. There are two main options for the Smooth Brush, Size and Shape Preset.
 Size: This value sets the radius of the brush in pixels from screen space. This is important to understand as zooming the view will change the result of the brush. With the brush size being fixed, zooming in on the model will decrease the relative scale of the brush whereas zooming out will increase it. Users can interactively adjust the Tip size value by RMB+click and haul in the viewport, adjusting an on-screen display representing the brush's size.
Shape Preset: The popup option includes several preset brush options for varying effects. This setting drives the profile of the airbrush. Users may also adjust the In and Out Slope and Weight setting to produce further customized brushes.

| Linear-- will create a straight ramp from the center to the edge which results in a brush profile that looks like a cone. |
|---|---|

| Smooth-- will create a brush stroke that is opaque in the center and falls off smoothly to the edge of the brush with an S curve shape. |

| Bulge-- changes the bias of the curve to start out slowly and then ramp more harshly towards the middle, resulting in a brush profile that looks similar to a dome. |

| Fat-- brush starts out soft and ramps harshly at the outer edge producing a soft 'U' shaped brush that varies the most under light tablet input pressure. |

| Sharp-- the falloff is very harsh and steep at the center producing a fine stroke. |

| Very Sharp-- this preset is nearly identical to the 'Sharp' version with a more extreme falloff for even finer strokes. |
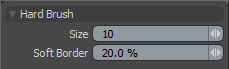
The Hard Brush creates a circular brush with a hard outside edge so that the paint is consistent from the center to the outside edge. There are two settings for the Hard Brush; Size and Soft Border.
 Size: This value sets the radius of the brush in pixels from screen space. This is important to understand as zooming the view will change the result of the brush. With the brush size fixed, zooming in on the model will decrease the relative scale of the brush whereas zooming out will increase it. Users can interactively adjust the Tip size value by RMB+click and haul in the viewport, adjusting an on-screen display representing the brush's size.
Soft Border: This value sets a small number of pixels around the outside of the brush for the falloff to occur. This results in a much more pleasing brush result. The default value of 20% yields a brush stroke that has the appearance of being completely hard edged while providing the paint system a small buffer in which to anti alias the stroke. Driving the number higher can result in interesting brushes that have a solid inner area and a linear falloff to the edge of the stroke.
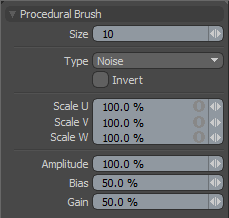
The Procedural Brush uses mathematical textures to change the amount of paint applied to the surface as the paint stroke is drawn. The options include a pop-up choice to select the procedural texture, a check box to invert the values of the procedural, Scale u, Scale v percentages and an Amplitude setting to control the strength of the effect.
 Size: This value sets the radius of the brush in pixels from screen space. This is important to understand as zooming the view will change the result of the brush. With the brush size being fixed, zooming in on the model will decrease the relative scale of the brush whereas zooming out will increase it. Users can interactively adjust the Tip size value by RMB+click and haul in the viewport, adjusting an on-screen display representing the brush's size.
Type: This popup has choices for Noise, Cellular and Dots. Each of these settings creates a different pattern for the brush based on the respective procedural texture.
Invert: This checkbox option will simply invert the values of the procedural.
Scale U: Changes the size of the procedural pattern along the U axis in UV space.
Scale V: Changes the size of the procedural pattern along the V axis in UV space.
Scale W: Changes the size of the procedural pattern along the W axis in UV space (along normal direction of the UV plane).
Amplitude: Changes the overall strength of the procedural
Bias: The 'Bias' option is like a curve adjustment to the procedural that favors one side of the range over the other, acting much like a gamma curve would affect the shades of an image.
Gain: The 'Gain' option in essence tightens the curve of the bias reducing the shades of gray in the transition. At 0%, there are the maximum number of transition values, attenuating toward 100% where the procedural would be completely hard edged.
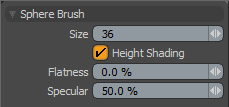
The Sphere brush creates a gradient effect inside the brush that uses the FG color in the center of the brush fading toward black at the edges with a smooth falloff between them. The resulting effect is that of painting a rounded brush stroke. This can be very useful when working with bump or displacement textures. There are two main modes for the Sphere Brush. Both are useful for color painting but one is intended mostly for displacement or bump painting.
 Size: This value sets the radius of the brush in pixels from screen space. This is important to understand as zooming the view will change the result of the brush. With the brush size being fixed, zooming in on the model will decrease the relative scale of the brush whereas zooming out will increase it. Users can interactively adjust the Tip size value by RMB+click and haul in the viewport, adjusting an on-screen display representing the brush's size.
Height Shading: When using the Sphere brush tip on a flat image map, enabling the 'Height Shading' option shades the brush tip the corresponding shades of gray representing the height of the sphere, producing a cylindrical shading to the brush application.
Flatness: The default value of 0% produces a fully round sphere attenuating toward 100% producing a completely flat brush, just like the normal Hard Brush.
Specular: The 'Specular' option controls the amount of faux specular highlight on the brush tips shading. At 0% there is no specular, attenuating toward 100% with full specular shading.
Like applying a sticker, users can use the Image Brush to apply bitmap texture images to a surface when either painting or sculpting. Depending on mode, users can control the placement of those images. When using the Image Brush in Stamp mode, the brush no longer uses a procedural stroke, rather the click and drag controls the diameter and rotation of the image inside the brush. To apply the image simply release the mouse or tablet button. When dragging the Image brush moving the tablet or mouse away from the original click location will increase the size of the brush. Dragging around in a circular motion adjusts the rotation of the brush. When you first click and drag a small handle appears. This handle is the visual cue as you edit the size and rotation of the brush. When in Roller mode, MODO continuously tiles the image in the direction of the stroke. Normal mode sprays images, similar to the behavior of other brush tips.
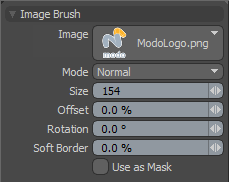 Image: This popup allows the user to select the bitmap image to be used as the brush tip.
Mode: Options for 'Normal', 'Roller' and 'Stamp'.
Normal--
Normal mode acts as any other paint brush with the image controlling the effect.
Roller--
Roller mode forces the brush to act similar to a roller painting tool where the image is revealed the further you drag the brush. This mode also causes the brush to rotate with your stroke.
Stamp--
Stamp mode causes the brush to "stick" down where you click. Dragging the mouse then controls the size and rotation of the brush. When you release the mouse the image brush is "stamped" down at that location scale and orientation.
Size: This value sets the radius of the brush in pixels from screen space. This is important to understand as zooming the view will change the result of the brush. With the brush size being fixed, zooming in on the model will decrease the relative scale of the brush whereas zooming out will increase it. Users can interactively adjust the Tip size value by RMB+click and haul in the viewport, adjusting an on-screen display representing the brush's size.
Offset: This control is particularly useful when working with the sculpting tools. The percentage value allows you to re-map the "zero-point" of the image. For instance, if your image was a grayscale ramp from mid-gray to full-white, the edges of the brush would create a "step" since the sculpting tools would have a 50% gray input at the edges of the brush. In this case you can set the Offset value to 50% and now the mid-gray value is considered the zero-point and will no longer cause any step effect.
Rotation: Use this control to effect the orientation of the brush.
Soft Border: This causes a smooth fade of the image to the edges of the brush. The percentage value determines how far from the edge of the brushes diameter the fade will begin. If you set a value of 10% the fade will begin 10% in from the outermost edge of the brush. When this value is non-zero a second ring will appear on the brush to indicate where the soft border begins.
Use as Mask: This control will use the dark areas of an image as alpha.
The Text brush provides a quick and easy way to use many of the fonts on your system as a brush while painting or sculpting, easily placing words, letters and numeric call-outs on textured surfaces. The tool includes a pop-up for choosing the desired font as well as a text input field to set the text string to be used as the brush.
To use the Text brush, first enter the desired text string and choose your font from the font popup. At this time you can also choose Bold or Italic styles. Make sure to have a painting or sculpting tool selected as well as the brush and then LMB+click and drag in the 3D view. As you drag to the right or left the 'Size' value of the brush will increase. Dragging around in a circle sets the 'Rotation' (orientation) of the brush. At this time users can continue to scale the text brush by simply moving the mouse further away from the center of the brush. When you release the mouse the brush will be projected onto the surface.
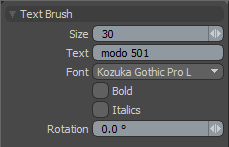 Size: The size of the projected Text string is determined interactively by the user dragging in the viewport. The Size value represents the radius of the circle generated by the tool when dragging, calculated in screen pixels. The Text tool always creates the text string from its center.
Text: This input field allows users to enter text that will be generated when the users drags in the viewport. While many the entry field will hold many characters, the text tool is best suited to no more than a few words.
Font: The 'Font' field is a button that, when LMB+clicked, displays all currently active TrueType and OpenType fonts on the users system. Users can choose a specific font from the fly-out menu. Once selected, the chosen face will be used with the Text brush.
Bold/Italics: These checkboxes allow users to produce faux 'Bold' and 'Italic' text faces when fonts of that type are not directly available.
Rotation: The rotation angle of the text (like the size) is determined interactively by the user dragging in the viewport. The angle is calculated from the point of the initial mouse click in the viewport to the position of the cursor when the user releases the button projecting the text block onto the texture.

