
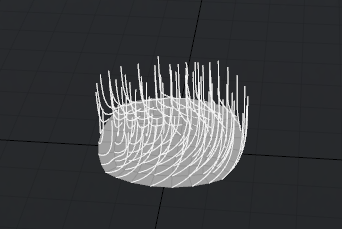
The 'Curl' brush adds swirls to fibers rotating them based on the size of the brush tip. The effect if similar to the 'Spin' sculpting brush with the curl effect projecting straight out from the brush tip through the viewport, so one can easily control its application by rotating the guides orientation within the viewport. The Fur brush can be combined with the 'Tips' to further customize how the brush styles the fur. The 'Curl' tool can be found in the 'Hair Tools' subtab of the toolbox, found in the 'Paint' tab of the interface. When selected, the following attributes display in the Properties viewport.
| 
| |
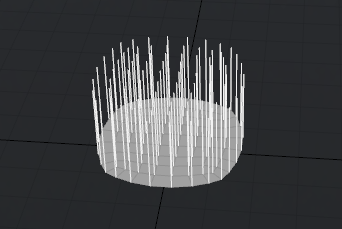
On the left, a group of guides, on the right the 'Curl' tool applied.
| ||
Hair: Curl--
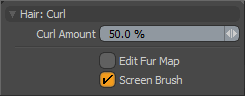 Curl Amount: The 'Curl Amount' value determines the strength of the brush stroke. Higher values will have a greater influence over the fibers than lower values.
Edit Fur Map: Users can style fur by way of a Fur Vector Map, providing a means to control combing direction and length with an image map, producing very detailed results. All that is necessary is a Fur Layer in the Shader Tree and a Floating Point image (such as EXR) with the layer effect set to 'Fur Vector'. Generally, the fur styling tools are meant to edit Guides, in order to edit the associated fur map, users need to enable the 'Edit Fur Map' option.
Screen Brush: The 'Screen Brush' option, enabled by default, will affect all vertices under the brush tips circle, regardless of their distance. When the option is disabled, only vertices that are within the 3D sphere of influence around the brushes tip will be affected.

