
The Spin tool creates a vortex of vertices around the center of the brush using the 'Normal Mode' to determine the axis around which the vortex will occur. This is very useful for creating swirls in a surface or simply adding some organic perturbation. The default normal mode is Brush Center which causes all vertices within the brush to rotate around that center point using the normal of the geometry at that point as the axis of rotation. It is also useful to change the Normal Mode to Screen which allows you to control the axis of rotation by rotating the view. The default method moves the vertices mostly along the existing surface while Screen allows the creation of over-hangs and more intense swirls. Pressing the 'Ctrl' key down while using the tool will twirl the surface the opposite direction. Pressing 'Shift' while using the tool will enable the 'Smooth' function. The 'Spin' tool can be found under the 'Paint' tab for the interface in the 'Sculpt' submenu of the toolbox. The tool can also be called from the menu bar under the "Texture > Sculpt Tools" menu. Additionally, the tool can be combined with the various 'Tips' as well as the 'Inks' and 'Nozzle' to further customize the way the brush affects the surface. When activated the following attributes are displayed in the Properties panel.
Sculpt: Spin--
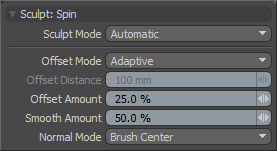 Sculpt Mode: The 'Sculpt Mode' determines which method of sculpting is to be used. By default the setting is 'Automatic' which will perform mesh based sculpts when there are no displacement images and automatically switch to image based sculpting when there an image is available. There are times when you may want to force MODO into mesh based sculpting even if you have an image applied for displacement. This can be very helpful for blocking out shapes and form, as mesh sculpting is only affecting the cage vertices of the base geometry.
Automatic-- chooses between mesh and image sculpting depending on availability of displacement image map texture.
Mesh-- forces the tools to perform mesh sculpting only.
Image Map (Details)-- forces the tools to perform image sculpting only.
Offset Mode: MODO provides two methods for calculating the way the tool moves the surface when brushing.
Adaptive: The adaptive mode will adapt to the surface that is being brushed on based on the setting for 'Offset Amount' and the size of the brush.
Absolute: When in 'Absolute' mode, the 'Offset Distance' setting will become active and users may enter a specific distance value the brush will conform to regardless of brush scale.
Offset Distance: This control is disabled unless the 'Offset Mode' is set to 'Absolute'. When active, the value determines specifically how far to displace the surface.
Offset Amount: Active only when the 'Offset Mode' is set to 'Adaptive', this percentage value modulates the extent of the brushstroke. The total scale of the sculpt deformation will be equal to the brush size times the offset amount percentage.
(Note: This is a very important value for controlling sculpted detail and as such it can be adjusted interactively by using the MMB+click and hauling left or right.)
Smooth Amount: The Smooth tool is such a useful method for controlling sculpt detail it is available with almost every sculpting tool in MODO and can be accessed by simply holding the Shift key down while sculpting. The Smooth amount attribute allows you to control the amount of smoothing applied when using the Shift qualifier with that specific tool. This is a convenience feature implemented specifically to enhance the sculpting workflow.
Normal Mode: This option controls the method used for displacing the sculpted vertices. The various options include:
Brush Center-- uses the geometry at the very center of the brush to calculate the direction along which to displace the mesh.
Vertex-- displaces each vertex along its own normal.
Average-- calculates an average normal for all the vertices inside the brush.
Screen-- displaces the vertices directly towards the active viewport.
Mouse Down-- uses the normal of the mesh surface directly under the mouse when the LMB is clicked. All displacement is then carried out according to that vector.
X,Y,Z-- allows you to pick a world axis along which to displace the vertices.

