
The Gear item is a plug-in item type that generates accurate procedural gear and cog shaped geometry with ease. Since it is procedural, the many channels can be animated, changing the design and look of the gear over time. Users can add a 'Gear Item to the scene using the 'Add Item' button within the Items List. If desired, users can convert the procedural Gear to a 'Mesh Item' by RMB+clicking on the item layer in the Items List and selecting the "Change Type > Mesh" option from the popup menu. Selecting the item will display its associated attributes in the Properties panel. Users can then adjust the options to customize the look and level of complexity.
 Name: This data field displays the current item name. Users may easily change it by LMB-clicking within the field and typing the new name.
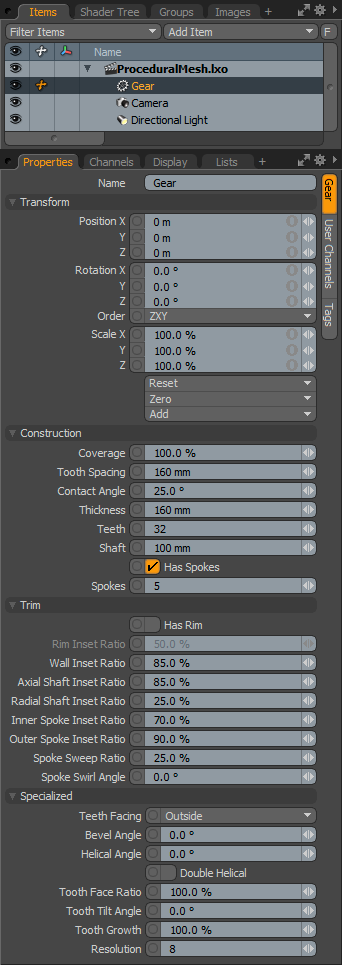
Transform--
Position: An Item transform that allows the user to numerically position the item in XYZ space. By default, Position transforms originates from the Center position.
Rotation: An Item transform that allows the user to numerically set the rotation of the item. By default, Rotation transforms originate from the Center position.
Order: Allows the user to set the order that rotations are applied to the camera item. Changing the order that rotations are applied can sometimes help to reduce or eliminate gimbal lock.
Scale: An Item transform that allows the user to numerically set the size of the item. By default, Scale transforms originate from the Center position.
Reset: Resets the selected transform values to (0,0,0) returning the items back to their default state.
Zero: Resets the chosen transform property values to '0', leaving the 'Center' position and Item position intact.
Add: Transform Items are the channel groups associated to an item that store its transform values, controlling its position, rotation and/or scale. By default, new items do not have any transform items associated with them (even though they are visible here within the Properties panel). This is useful as an optimization as only the necessary transforms are added on an as-needed basis, reducing scene overhead. There are several ways to add them. One is by simply transforming the target item with one of the various transform tools (or by editing the values input fields). This action will cause the particular transform item to be added automatically to the 'Channels' viewport list. The 'Add' function here can also be used to add the selected set of transforms to the Channel list while keeping the default 0,0,0 values (a necessary step for 'Referencing', in order to override the channels, they must first exist).
Construction--
Coverage: Percentage of constructed shape
Tooth Spacing: Space between each tooth
Contact Angle: Angle of each tooth (up to 45 degrees)
Thickness: Thickness of the gear
Teeth: Number of teeth for the gear
Shaft: Size of the shaft
Has Spokes: If the interior of the gear has spokes
Spokes: Number of spokes in the interior of the gear
Trim--
Has Rim: If the interior of the gear has a rim
Rim Inset Ratio: Ratio of rim thickness to total thickness
Wall Inset Ratio: Ratio of wall offset amount
Axial Shift Ratio: Ratio of gear wall to gear radius
Radial Shaft Inset Ratio: Ratio of shaft rim to gear radius
Inner Spoke Inset Ratio: Ratio of inner spoke thickness to total thickness
Outer Spoke Inset Ratio: Ratio of outer spoke thickness to total thickness
Spoke Sweep Ratio: Ratio of spoke sweep to spoke spacing
Spoke Swirl Angle: The angle by which the spokes should be swirled
Specialized--
Teeth Facing: The direction in which the teeth are facing
Bevel Angle: Angle of tooth bevel
Helical Angle: Angle of tooth helix
Double Helical: Double helical (herringbone) pattern
Tooth Face Ratio: Ratio of tooth face to thickness
Tooth Tilt Angle: Angle of tool tilt along the rotational axis
Tooth Growth: Amount of tooth growth
Resolution: Overall geometry resolution, higher values produce smoother shading, but create more polygons at render time.

