
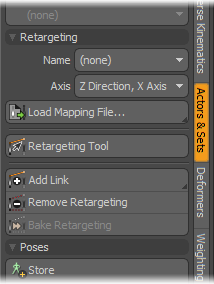
Retargeting is the process of transferring motion from one hierarchy of items to another. Typically this might be a character's walk or run cycle that would be reused on another character, which may have different proportions from the original. The motion can originate from existing keyframe animation in the scene, or can be imported motion, such as with an animated FBX file, or a BVH motion capture format import. The commands and tools for retargeting can be found in the 'Retargeting' section of the 'Actors & Sets' toolbar found in the toolbox of the 'Setup' interface layout.
Preparation for Retargeting
Source Skeleton
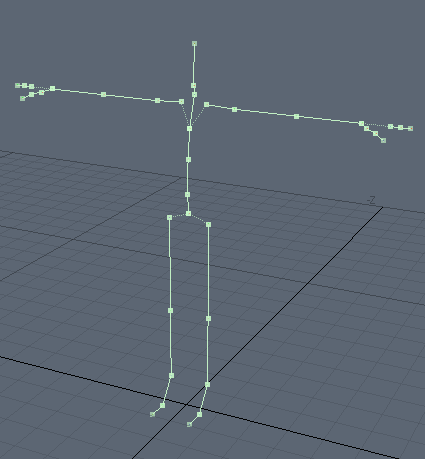
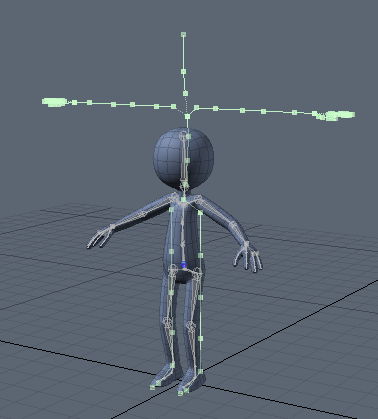
The 'Source' skeleton is the motion source for the retargeting (the joints that contain the animation). While in 'Setup' mode' this skeleton must be set to a default T-Pose (illustrated below) with all of its rotations set at '0' (zero). The T-pose is commonly used in motion capture data, although some files may have the arms set vertically. See the section on Importing Motion for more information.
Target Skeleton
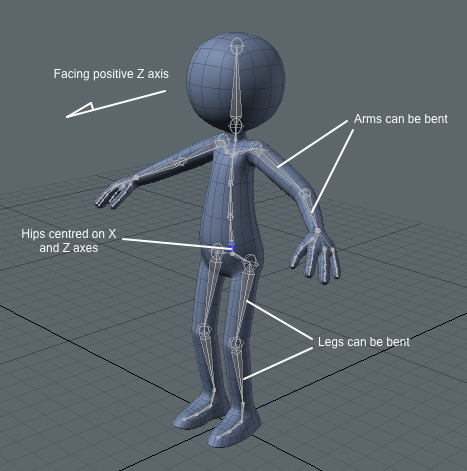
The skeleton onto which the motion data is loaded must be a single, continuous hierarchy of items. Motion cannot be retargeted onto individual, unconnected items. This skeleton must also be in a standard T-pose as well. However, since arms and legs are often partially bent to aid deformation and IK solving, MODO will compensate for this when applying the retargeted motion. All other joints should be at their rest orientation. The skeleton must also be facing the Z+ axis with its root centered at the origin on the X and Z axes. However, it may be positioned offset on the Y axis.
Tagging the Target Skeleton
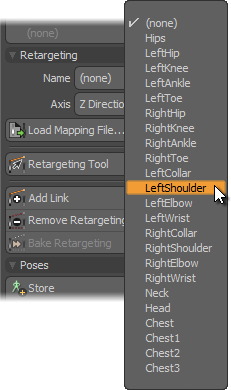
To help MODO identify particular joints in the target skeleton during the retargeting process, they should have common names assigned that follow a standard scheme (as is often the case for motion capture). MODO uses the Character Studio Biped naming convention (illustrated below) as this is found in the greatest majority of freely available motion capture files. Note: This step is optional but it will greatly reduce the amount of time it takes to retarget the motion onto the skeleton. This naming structure allows MODO to perform various tasks automatically, such as scaling the motion to adapt for different sized skeletons, etc.

To assign a name to a joint, simply select the target item and choose the appropriate pre-defined 'Name' from the popup menu in the 'Retargeting' section of the 'Actors & Sets' toolbar (found in the 'Name' menu). When an item is selected, the menu will update to show the currently assigned name. To remove a tag from an item, select the '(none)' option from the top of the menu.
Defining the Target 'Actor'
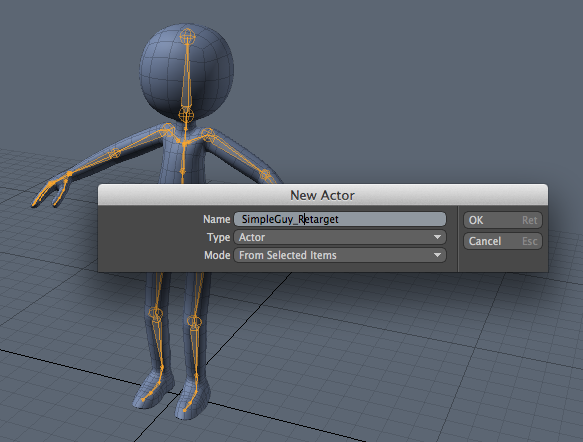
Retargeting uses the 'Actor, Action & Pose' functionality to help identify the target joints. It may be helpful to reference that page of the documentation if you are not familiar with this functionality. To assign a hierarchy as an 'Actor' LMB+double clicking on the root item of the target skeleton (generally this is the 'Hips') selecting the entire hierarchy, next choosing the 'Actor > New' option from the 'Actors & Sets' toolbar opening the create 'New Actor' dialog. Make sure the 'From Selected Items' option is set as the 'Mode; and enter a name for the skeleton (for example 'SimpleGuy_Retarget') and press 'OK' to make the Actor group.
Importing Motions
BVH Format Motions
The BVH format was developed by a now defunct motion capture company named 'Biovision' as a means for them to deliver the motions to their customers. The format has since gone on to become an industry standard because of its simplicity and ease in implementation. Each Biovision (*.bvh) motion capture file contains a definition for the skeleton along with the actual motion data. The skeleton definition in the file needs to be created in MODO in order to apply the initial motion data to it. However, once that has been done, further BVH files that use the same skeleton hierarchy can be loaded as additional 'Action' states to the same 'Actor'.
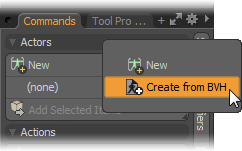
To load a BVH file, select the 'Create from BVH' option in the 'Actors > New' tool menu in the 'Actors & Sets' toolbar (shown below). This will open an OS specific file requester, navigate to the desired BVH file and press 'Open' to load the file. Once loaded, MODO will automatically construct the skeleton from the definition in the BVH file, create an 'Actor' containing the skeleton items, and create an 'Action' containing the motion capture data. The resulting 'Actor' will be named 'ActorBVH' by default and the 'Action' containing the motion will be named by the imported file (for example 'Run.bvh').
To alleviate various sizing issues, the generated skeleton is automatically scaled to 2m in height (approx. 6 feet) with appropriate adjustments made to the imported motion to match. It will also center the Setup pose at the origin (if necessary) and position the root upwards in Y+ direction, placing the feet on the ground. The new 'Action' containing the imported motion will be made active allowing the animation to be previewed in the 3D viewport.
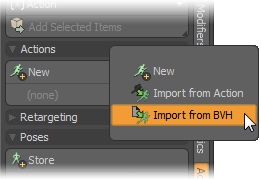
If there are additional BVH files that use the same skeleton, their motion can be loaded as additional 'Actions' into the same 'Actor'. Choose 'Import from BVH' from the 'Actions> New' tool menu. This will open an OS specific file requester, navigate to the desired BVH file and press 'Open' to load the file. Once loaded a new 'Action' is created with the name of the BVH file. Any number of additional motions can be loaded this way, as long as they all use the same skeleton. Switching between the various motions is done in the normal way, by choosing the desired 'Action' from the available choices in the popup menu.
FBX Format Files
FBX is a scene data exchange format for transferring geometry, animation and other data between applications. Files that contain skeletons with animation data can be loaded and retargeted onto other characters. The FBX file must first be loaded using the 'File > Import...' command, loading the files contents into the current scene. This will create a skeleton with the motion information applied.
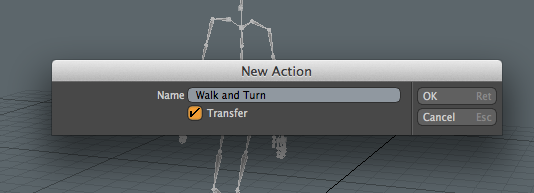
For retargeting this skeleton must be assigned as an 'Actor' for the entire skeleton using the same method described above. The skeleton must also be in the default T-pose while in 'Setup' mode. If not, then all joints must be rotated until it is. Once this is done, the motion in the skeleton has to be transferred to an 'Action'. To do this, first make sure to exit 'Setup' mode, then create a new 'Action', using the 'New' button.
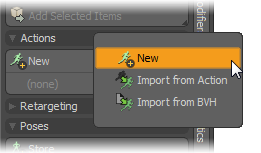
This opens the 'New Action' dialog box. Give the action an appropriate Name and make sure the 'Transfer' option is enabled to move the animation from the scene into the 'Action'.
Since there is no way to load the FBX motion data without the skeleton, the process of loading multiple motions into the same 'Actor' is different from that used for BVH files. The steps below will need to be followed for each FBX file.
-Import the FBX file. Create a new 'Actor' for the skeleton.
-Create a new 'Action' and transfer the animation as described above.
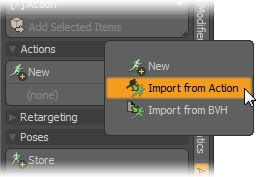
Once that has been done the motion can be copied to the target 'Actor'. Making the original 'Actor' current by selecting it in the popup menu. Next, select the 'Import from Action' command from the 'New' Action tool menu.
In the resulting dialog make sure that 'Actor' is set as the 'Source'. Then select the desired 'Actor' that contains the motion that was just loaded and the 'Source Action' that will be transferred. Designate a name for the resulting action in the 'New Action Name' field (it will default to the name of the source 'Action' if left blank).
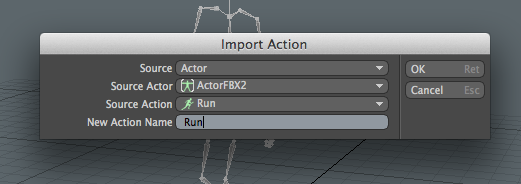
Press 'OK' for the 'Action' to be copied to the current 'Actor'. This sequence can be repeated for each FBX motion. Once all the motions are transferred, the (now unnecessary) source skeletons can be deleted.
Retargeting
Retargeting Tool
Now that the Source and Target skeletons have been properly setup its time for the actual 'Retargeting'. This is performed in 'Setup' mode using an interactive tool. Note that it is OK if the skeletons have different sizes and proportions.
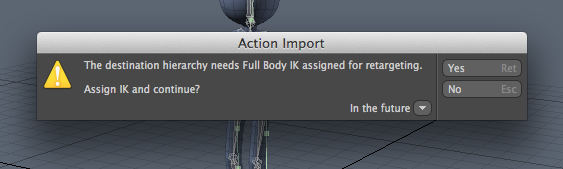
To activate the tool first select the root joint of the source skeleton, followed by the root joint of the target skeleton (in that particular order). Then LMB+click the 'Retargeting Tool' button. It can be found in the 'Retargeting' section of the 'Setup' layout toolbox (under the 'Actors and Sets' subtab, it may also be minimized by default). MODO uses its Full Body IK to help solve the retargeting, the Retargeting tool will first check if IK has been assigned to the target skeleton and add it if required, users will be prompted with the following dialog-
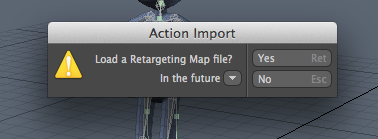
The Retargeting tool will then ask for a 'Retargeting Map' file. These files store the retargeting information for a pair of skeletons, allowing the retargeting to be applied automatically. If this is the first time these skeletons have been mapped then choose 'No' to continue to the next step. If the skeletons have been mapped before and a mapping file has been saved for them (see the 'Mapping Files' section below) then choose 'Yes' to open a file requester. Choose the mapping file and click 'OK'. All the retargeting will then be applied and you can view the motion on the character immediately in the 3D viewport.
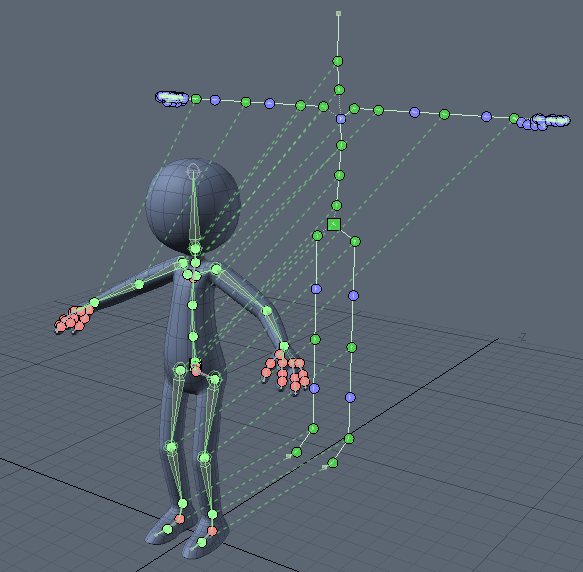
The retargeting tool will then draw its handles in the 3D views. The source skeleton is moved back temporarily to help make the connections clearer, it will be restored when the tool is disabled. If a mapping file was not chosen the tool will examine the skeletons and make as many connections as it can automatically, using the joint names defined in the setup phase to identify matching joints. Since the root items can be awkward to access in the 3D views, the tool will map these automatically and also add a 'Position Pin' (described below).
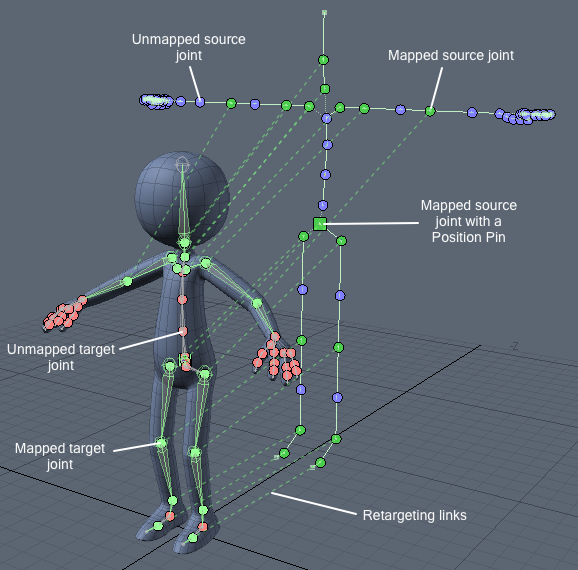
The tool uses color coded connection handles (drawn as solid circles) to allow new links to be made and provide feedback on existing connections.
Blue: An unmapped joint on the source skeleton
Red: An unmapped joint on the target skeleton
Green: A mapped joint
Retargeting links are drawn as dotted lines between mapped joints. The wireframe color of mapped joints on the target skeleton is changed to green to show that the joint is currently driven by retargeting, even when the Retargeting tool is off. Once retargeting is removed from the skeleton the original color of the joint will be restored. New links are added by LMB+click dragging from a blue source connection handle to a red target handle. Links can be removed by 'Ctrl'+LMB+clicking on a source or target connection handle.
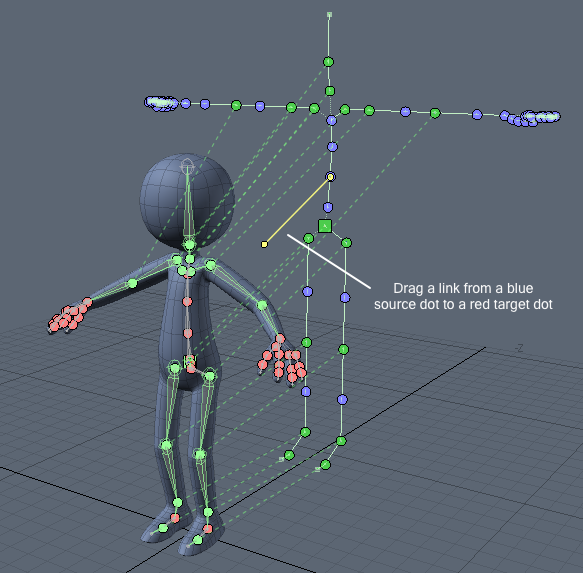
Adding a new link.
The skeleton fully mapped.
The retargeting links, described above, map the 'Rotation' of a source joint to the 'Rotation' of a target joint. Translational mapping (the actual movement), is achieved by the use of 'Position Pins'. These take the 'Position' of a source joint and apply it, scaled, to that of the target joint. The scaling is based on the difference in proportions and size of the target skeleton, compared to its source. Position Pins almost always need to be applied to the root of the target skeleton, so they are added automatically when the Retargeting Tool is activated.
When a 'Position Pin' is assigned to a joint, the green circular handle will change to a green square shape. Position Pins are enabled as a toggle, turning them on and off by RMB+clicking on a source or target handle. Removing a position pin can be achieved by using 'Ctrl'+LMB.
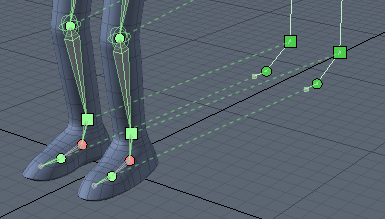
The automatic scaling that is applied when linking skeletons of different scales, helps to reduce any foot sliding. Adding a 'Position Pin' to the character's feet can further improve the results. These pins can be applied to other parts of the skeleton as well, when desired. For example, if a motion involves the characters hands resting on the ground (such as with a handstand) 'Position Pins' can be applied to the wrists to help keep them in place.
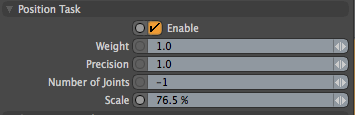
Note that if retargeting tags have not been assigned to the target skeleton, then automatic scaling cannot be applied and needs to be set and adjusted manually. The 'Full Body IK' settings 'Position Task' attribute has a 'Scale' channel which can be used for this purpose. This is also useful to make adjustments (if necessary) to the automatic scale that's calculated from the retargeting tags.
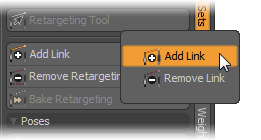
Adding & Removing Links Manually
Some joints can be awkward to access with the Retargeting tool. This might be because they may be very close to other joints or even in the same position. In these cases links can be made manually using the 'Add Link' and 'Remove Link' buttons found under the 'Retargeting Tool'. These can be used with the tool on or off. To add a link, select the source joint followed by the target joint and LMB+click the 'Add Link' button. To remove a link select the target joint and LMB+click the 'Remove Link' button.
Previewing the Motion
Once all the retargeting links have been assigned, exiting 'Setup' mode will allow the user to preview the retargeted motion now applied to the character. The connector dots are drawn to make the mapping clearer. Users can go in and out of 'Setup' mode while the Retargeting tool is active as many times as necessary while editing the retargeting. If the source 'Actor' has multiple 'Actions' its possible to switch between them and see each motion applied to the character.
Mapping Files
A 'Mapping File' stores the retargeting information for a skeleton pair, allowing retargeting to be reapplied, if required, automatically. Once retargeting has been finalized it is a good idea to save a mapping file for the skeletons, in case further motion needs to be applied in the future, after retargeting has been removed from the target skeleton.
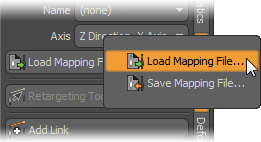
Mapping files can be saved at any time provided the 'Actor' for the target skeleton is selected in the Actor popup menu and retargeting is applied to the skeletons joints. Mapping files are be loaded when activating the Retargeting tool, a requester will appear asking if one should be loaded. Note that the items in the file are identified by name so it's best to perform retargeting in a scene with a minimum of other items.
Removing Retargeting
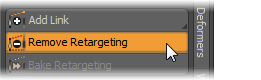
Retargeting can be removed from a skeleton by clicking on the "Remove Retargeting" button in the toolbar. This must be performed in 'Setup' mode with the target skeleton selected.
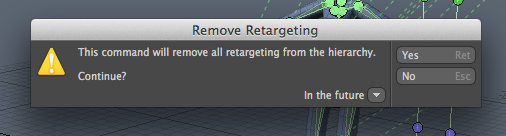
LMB+click the button to initiate the removal, opening a warning confirmation dialog box. Pressing 'Yes' will remove all retargeting links, Position Pins and tasks from the skeleton and the joints will be restored to their settings and original colors. Full Body IK is not currently removed .
Baking the Animations
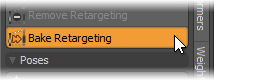
Baking applies the retargeting to the joints of the target skeleton by generating actual keyframes (at every frame) of the motion, for each joint in the skeleton. Once baked the retargeting can be removed allowing keyframes to be manually edited, for instance to adjust the motion or clean up any jittering found in the motion capture data. Baking is initiated by selecting the root element of the target skeleton and LMB+clicking the 'Bake Retargeting' button in the toolbox.
This action opens the 'Bake Retargeting' dialog panel where the 'Start and End Frames' are defined.
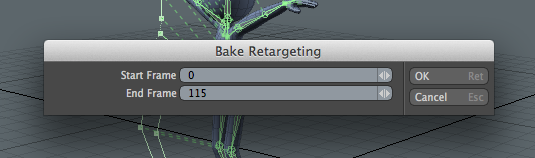
Baking writes keyframes for every frame to the currently active 'Action' for the target skeleton or to the scene 'Action' if one is not active. Pressing 'OK' opens a warning dialog before baking commences.
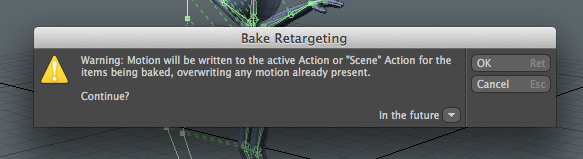
To avoid overwriting an action the simplest option is to make sure that no 'Action' is currently selected before baking for the target 'Actor'. A new 'Action' can be created afterwards if the baked motion is satisfactory. Pressing 'OK' on the warning dialog will show a progress bar as the baking is applied to the retargeting. Once baking has finished a dialog is displayed asking if the retargeting should be removed from the target skeleton. Select 'Yes' if a single motion is being baked to the target skeleton or 'No' when there are further motions on the source skeleton that need to be baked. Removing retargeting removes all the retargeting links, Position Pins and restores the original settings and colors of the target joints. It will also deactivate the Retargeting tool if necessary.
Once baking has been completed a new 'Action' can be created for the baked motion. Choose the 'Actor' for the target skeleton and then click on "New..." in the 'Actions' section of the toolbar. Enter a name for the new 'Action' in the dialog and make sure the "Transfer" option is checked to copy the motion from the scene 'Action' to the new 'Action'.
Baking Multiple Motions
If the source 'Actor' has multiple motions these can all be baked together before the retargeting is removed. Choose the 'Action' to be baked from the source 'Actor'. Select the root of the target skeleton, making sure there are no active Actions for the target 'Actor'. Click on the 'Bake Retargeting' button. When prompted in the dialog if retargeting should be removed select the 'No' option. Create a new 'Action' for the target 'Actor' and transfer the baked motion from the scene 'Action' (as outlined earlier). Repeat these steps for each motion belonging to the source 'Actor'. When all the motions have been baked the retargeting can then be removed from the source skeleton and there will be a separate 'Action' for each of the motions in the target Actor.

