
The Pose tool allows users a simple means to pose and animate item hierarchies, manipulated by an intuitive pin and drag workflow. While primarily targeted at character skeletons, the Pose tool can be used to modify and animate any hierarchy of locator type items (this includes just about anything that appears in the Items list). The main benefit of the Pose tool outside of its simple to use operation is that it is not necessary to apply any IK to the hierarchy first; the Pose tools takes care of IK automatically, though any rig that does contains IK will enhance the use of the tool.
Using the Pose Tool ![]()
The Pose tool is found in the 'Setup' and 'Animate' interface tabs in the upper left toolbox. Prior to activating the tool, make sure to select the Root item of the target hierarchy. For more information on defining hierarchies, please reference that page of the documentation. Once selected, click the icon button to activate the tool. When active, small white circles draw in the 3D viewport at each items 'Center' point position representing its center of rotation. Hovering the mouse pointer over any of these circles will highlight the element yellow. A LMB+click and drag will move the highlighted item. If the root element was clicked and dragged, the entire hierarchy will move rigidly, but if subsequent child items are moved, they will move as if IK has been enabled, where one element will drag along another element earlier in the chain. In order to keep an element from moving it can be pinned, hover the mouse pointer over a joint and RMB+click; now when any other elements are moved the pinned elements will remain in place. Users can pin as many elements as required, and pins can be enabled and disabled freely while positioning the character. The Pose tools always uses the pins to localize the effect of dragging joints, working from the joint being dragging up the hierarchy chain until it finds a pinned joint or gets to the root. The tool also looks down the hierarchy for any pinned joints and will try to find the best fit it can for the skeleton based on the currently pinned joints and their initial orientations; some movement around the pins should be expected when dragging points.
Root--
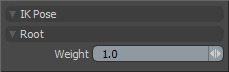 Weight: This option determines how freely the root of the hierarchy will move. A 'Weight' of '0' will keep the root in place.
Posing Controls
LMB+click drag to move any joint in Screen (viewport) space.
Ctrl+LMB click drag will move the joint in World space.
RMB+click a joint to pin/unpin, pinned joint will display as red circles.
Ctrl+RMB click to fix pin/unpin on subsequent keyframes/poses (requires IK assignment).
RMB+click on background to release all pins.
Shift+LMB click and drag to twist a joint.
MMB+click drag for traditional FK (forward kinematics - only the dragged joint will be affected)
LMB+click drag on background to move the Root item.
Posing IK Setups
The Pose tool will work with any hierarchy of items, they don't need any special alignment or setup, but they can benefit from some hints on which way joints should rotate and on which axes. This is done by assigning full body IK to the hierarchy and setting the joint parameters, for example one can tell the Pose tool to only bend a knee joint on a single axis by setting that up in the IK properties for the knee. The Pose tool will read any IK settings from the joints, taking into account States, Axes, Weights and Limits. For more information on setting up IK, please reference that page of the documentation.
Simple Animation
The Pose tool can be used to provide a simple and quick means of animating characters with very little setup using MODO's auto keying function. When set to 'Animated' any modified channels will automatically get a new keyframe. Prior to applying any animation, each item in the hierarchy need to have an initial keyframe. The Root item will need a 'Position' and 'Rotation' keyframe, and all Children will only need rotation keyframes. This should all be done on a default, base pose. A quick way to apply keys to many items is to LMB+double click the Root item (selecting the entire chain) and press the 'Key Rotation' button under the timeline. Don't forget to set the position key for the Root as well. Now users can move the timeline around and adjust poses with the appropriate keyframes being set automatically for joints as the time is changed. Keyframes can also be applied to entire Characters at once using the Actor & Pose and options. Please reference that page of the documentation for more information.

