
Working with Fur
Home >> Shade, Light & Render >> Shader Tree Items >> Fur Material >> Working with Fur


Working with Fur in modo couldn't be easier. Simply select some polygons, create a material tag for your surface. Once you've tagged your surface, modo automatically creates a group item with its own material in the Shader Tree. Highlight the new material item and click on the 'Add Layer' popup above the shader tree, and select 'Fur Material'. There is now Fur on your surface. Pretty easy.
The 'Fur Material' layer itself offers a good degree of control over your Fur with its various settings. However, there are some additional techniques related to fur that, while covered elswhere, it should be easier to have an overview of them all on one page. Techniques, such as working with Guides, Implicit UVs & Gradients will allow users to really control and shape the look they want for their fluffy (or maybe frazzled) fur.
Guides
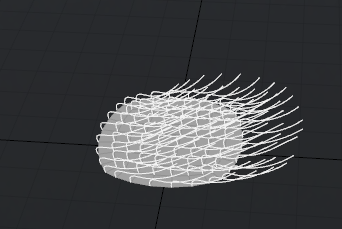
Guides for fur can be created a number of ways. As long as they share the same material tag as the fur material layer they'll work (Simply select the guides in 'Polygons' mode and assign a tag same as for regular polygons). Guides can be created with the Curve, Bezier or Sketch tools, or you can even create a number of vertex points and hit 'Shift-O' to create an open curve. Yes, Guides are just normal curves and can be manipulated with any of the numerous tools modo offers, there are also a good number of new tools added specifically for working with fur guides. Another thing to keep in mind when drawing curves as fur guides is the root of the curve needs to originate close to the surface your fur will grow from. It's easy to tell which side is the root, as a small circle is drawn around the root vertex for all curves.
Hair Guide Tool--

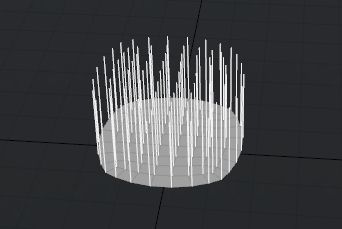
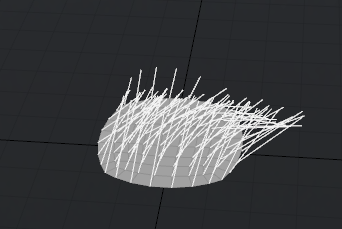
Outside of manually creating guides, the easiest way create them is using the 'Hair Guides' function in the Painting/Sculpting toolbox under the 'Hair Tools' tab. The hair guides this tool creates inherit the material tag from the selected surface, so it is best to name your fur surface with a proper material before activating it. If your polygons aren't already selected, highlight the polygons you want your fur to grow from and keep them highlighted. If you dropped your material selection earlier, you can easily bring it back using the Statistics Panel and selecting by 'Material'. Once you have your polygon selection and have activated the tool, you get this properties panel allowing you to click in your 3D viewport to actually generate the fur guides. LMB+clicking and hauling left of right will grow or shrink the guides in length. You can also manually set the length directly in the tool properties.
 Hair Guide Tool--
Number of Segments: This setting is independent of the fur segments, specifying the number of segments used to create the guides themselves. Increasing the number of guides can allow for more detailed control, but watch out as manipulating them with too many segments can become cumbersome and may produce less than satisfactory results. Add just as many as you need.
Max Number of Guides: Generally, with this tool, a guide is created at each vertex position on the surface. If your surface has a lot of polygons, you may wish to control the number of guides it creates using the 'Max Number of Guides'. If your selection has less than the max number of vertex points, only that many guides will be created.
Length: Users can use this setting to manually set the guide length to a specific value.
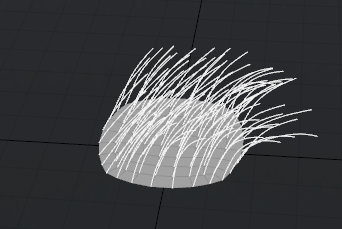
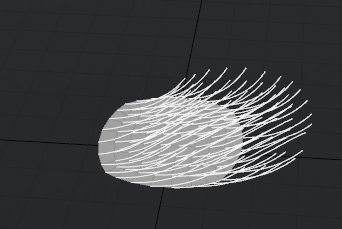
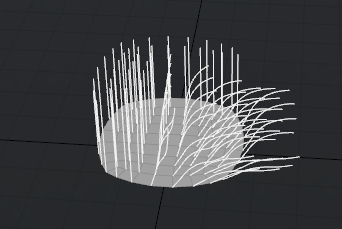
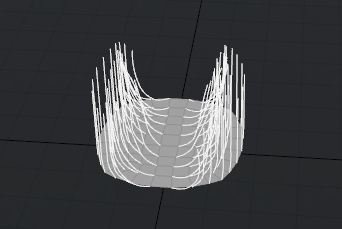
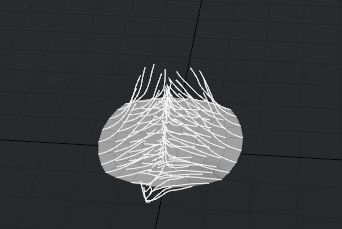
Bend Mode: With 'Bend Mode' you can choose how the generated guides will bend based on 'View Direction' or 'Gravity'. With 'View Direction', the guides will grow straight from the normal direction of the polygon, but bend based on the rotation of the currently active viewport. This is cool because you can select a few polygons from your fur surface and create the guides with the view rotated one direction. Then select some other polygons and create the guides with a different rotation, getting you half way there with the styling. 'Gravity' will bend the guides toward the negative 'Y' direction.
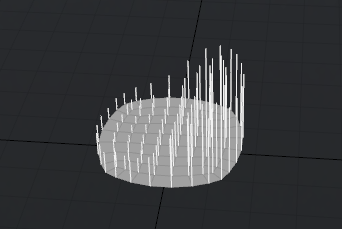
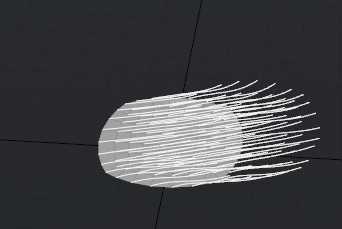
Bend Amount: The 'Bend Amount' controls the how far a guide will bend when it is created. A setting of 0% would grow guides perfectly straight in the direction of the vertex normal at its root, increasing this value will increase the intensity of the bend.
Detect Collisions: When creating the guides, you might find some are intersecting with surrounding surfaces. Enabling 'Detect Collisions' will avoid this situation by detecting surrounding surfaces realistically drooping and bending the guides around them. Best example is generating guides for long hair, you don't want the hair to intersect the shoulders, so enable this setting to drape the guides over the shoulder for a more realistic look
Collision Radius: You still might find that fur generated from guides intersects with a surface. When 'Detect Collisions' is enabled, the collision radius allows the user to offset the guides from the surface by the specified amount to avoid the intersection. Quite often guides will be used in 'Range' mode, generating fur fibers within a certain range around the guide. It may be helpful to set the collision radius to half the range (as range is a diameter) to effectively avoid fibers intersecting the surfaces as well.
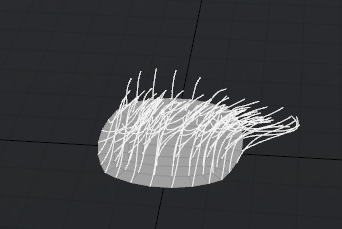
Styling
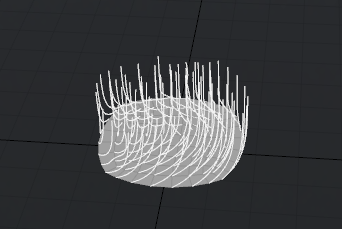
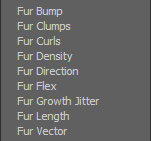
Much like the sculpt and painting tools, modo offers a variety of tools meant specifically for styling your fur. Located in the 'Paint' tab of the default workspace, the hair tools tab (along the edge of the toolbox) give you everything you need for combing and sculpting fur into the proper do. The tools all work double duty styling both guides, and when 'Edit Fur Map' is selected in the tools properties, you can paint on image maps meant to control the styling of regular fur as well. Image maps can control many different aspects of your Fur Material, such as Length, Density, Direction, Curling etc. All are available when right clicking in the 'Effect' column of any procedural or image map texture layer. Yes, even procedurals can control your fur material layer, but we'll get into that further below.
Hair Tools--
The Hair Tools tab offers several brushes for styling your fur in a variety of ways. They work just like the painting and sculpting brushes, so you'll need to select a brush tip before styling with each. For ease of setup, some preset scripts have been created for the most common fur styling tasks - 'Add Fur Vector Texture', 'Add Fur Direction Texture' and 'Add Fur Length Texture'. These scripts when activated, will automatically create a blank image, and apply it with the appropriate 'Effect' setting in the shader tree for your Fur Material. For information regarding Brush Tips, refer to the Painting & Sculpting section of the documentation. Here are the basic functions of the styling brushes--
Push--
The 'Push' brush pushes and pulls fibers as the brush moves over them. The Offset Amount controls the brush's strength.
Smooth--
The "Smooth' brush straightens and smoothes bent and kinked fibers. The Smooth Amount controls the brush's strength.
Comb--
The 'Comb' brush works much like a virtual comb, dragging fibers in the direction of the cursor. The Offset Amount controls the brush's strength.
Move--
The 'Move' brush moves the fibers for easy controlled shaping. The Offset Amount controls the brush's strength.
Curl--
The 'Curl' brush adds swirls to fibers rotating them based on the size of the brush tip. The Curl Amount controls the brush's strength.
Separate--
The 'Separate' brush moves adjoining fibers or guides apart from each other. The Offset Amount controls the brush's strength. Pressing the 'Ctrl' key while painting will invert the effect and gather the fibers together.
Stretch--
The 'Stretch' brush extends the length of your fibers. The Stretch Amount controls the brush's strength. Pressing the 'Ctrl' key while painting will invert the effect lengthening the fibers.
Root Puff--
The 'Root Puff' brush will rotate the root of the fibers or guides toward the direction of the surface normal when they've been combed to the point where the roots are rotated parallel to the surface.
Texturing fur with Shader Tree Layers
 Fur layers take all their color and shading information from the material layer. Set you material to red and you'll get red fur, set it to 50% transparent and your fur will become transparent. Most fur and hair has a great deal of variation to it and texture layers are a great way to control how the fur looks and add that necessary variation. Texture layers can also add specific, highly accurate control to fur styling and coloration. Several effect channels are available to both procedural and image map texture layers.
By adding a blank image to your material group (Images tab > New Image) and setting the layer to your intended effect, you can use any of the painting tools directly in modo to adjust, color and style your fur (you'll see a little paintbrush icon in the eye column of the shader tree letting you know that's the layer you're painting on). Remember that the fur material pulls its shading from the material layer, so all the ways you can adjust your material with texture layers are also available to you fur layer. Apply an image map as diffuse color, and each fiber will pull its color from the underlying texture layers color.
Gradients--
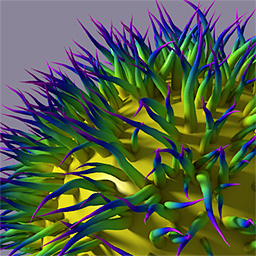
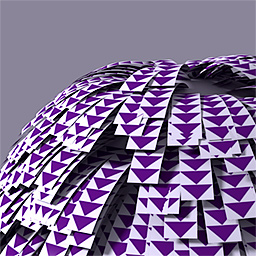
Gradients are also useful for fur layers. Outside of all the ways a gradient normally controls a layers surfacing parameters, you can use gradients to control each fibers along its length by applying the 'Fur Parametric Length' setting as the Gradient's 'Input Parameter'. Now, whatever you set as the 'effect' for the gradient --Diffuse Color, Transparent Amount, whatever effect you'd like to control will apply from a fibers root, at 0% to the tip at 100%, regardless of the length. Maybe you just want to mix up the colors of the fibers, or simulate a salt and pepper type effect. That's possible with gradients as well. As each fiber is created by modo, it is assigned a random value between 0 and 1. Setting the gradients input parameter to 'Particle ID' allows you to add some randomization to the individual fibers with ease as it takes that random number and pulls the color from the gradient based on its value.
|
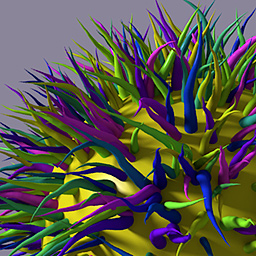 A 'Particle ID' Gradient applied varying the individual colors. |
 Implicit UVs--
UV maps are a great way to control how images are applied to surfaces, so you might be wondering if it is possible to apply image maps to individual fibers as well. Luckily, there is. When you have your fur type set to 'Strips' (remember there are 2 types -Cylinders and Strips) images will map to each strip individually, when fur type is set to cylinders, image will wrap around the fiber cylindrically. Applying images for fur has lots of uses, simulating feathers, making photo real grass to name two of them. One can simply add a texture to individual fibers by adding an image map layer to the material group. In the Texture Locators properties you want to select 'Implicit UV' as the projection type within the texture locator (see above). That's it, now your image will be applied to each and every fiber as it renders.
Material Layers and Multi layered Fur
Each Fur layer pulls its shading from the material layer, but there are probably lots of instances where a user would want the fur material to be different from the underlying surface. That's possible as well. Here's a quick rundown of how to do it.