
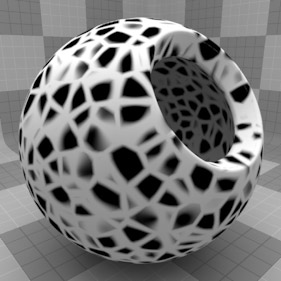
The Cellular texture is one of the many procedurally generated textures provided with MODO. Procedural textures are mathematically created at render-time, and therefore have no fixed resolution, they can be magnified nearly infinitely with no visual loss in detail. The cellular pattern can be addressed by its two zones, the 'Cell' and the 'Filler'. The texture will modulate from one zone to the other based on the type and the users settings. Each zone can have a value, color and alpha value. Which of these are used is dependent on the 'Effect' to which the texture will be applied. For instance, if the texture is applied as a displacement, the 'Value' settings would be utilized whereas setting the texture Effect to 'Diffuse Color' would use the 'Color' and 'Alpha' settings for Cell and Filler. The Cellular texture is incredibly versatile and can create effects ranging from veins and cobblestone to crumply water and lizard skins.
For information regarding adding and working with Shader Tree Items Layers, please reference the Shader Tree page of the documentation.
 Layer--
Enable: Toggles the effect of the layer on and off, duplicating the functionality of toggling visibility in the Shader Tree. When un-checked (disabled), the layer has no effect on the shading of the scene. However, disabled layers are saved with the scene and are persistent across MODO sessions.
Invert: Inverts the RGB values for the layer producing a negative effect.
Blend Mode: Affects blending between different layers of the same effect type, allowing user the ability to stack several layers for different effects. For more on blending, please reference the 'Blend Modes' page of the documentation.
Opacity: Changes the transparency of the current layer. Reducing this values will increasingly reveal lower layers in the shader tree if present, or dim the effect of the layer itself on the surface.
Locator: Most texture layers also have an associated 'Texture Locator' that is automatically created in the 'Item List'. This defines the mapping of the texture (way the texture is applied) to the surface. The 'Locator' option sets that association. Users can choose alternate locators, however, the need to do so will be very rare; still, there are some possible instances where users may want multiple texture items to share a single locator.
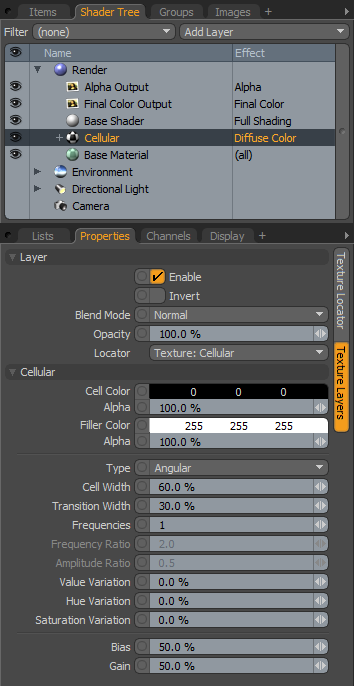
Cellular--
Cell Color: Determines the color of the texture where the Cell is most concentrated. This color will ramp to the Filler Color. The Color option is only used when the texture layer is set to an Effect that requires color. The dedicated Cell Color 'Alpha' will determine how transparent the Cell zone will be.
Cell Value: Determines the magnitude of the texture where the Cell is most concentrated. This value will ramp to the Filler value. This control is only active when the texture layers Effect is set to a non-color attribute.
Filler Color: Determines the color of the texture between the Cells. This color will ramp to the Filler Color. The Color option is only used when the texture layer is set to an Effect that requires color. The dedicated Fill Color 'Alpha' will determine how transparent the Fill zone will be.
Filler Value: Determines the magnitude between the Cells. This value will ramp to the Filler value. This control is only active when the texture layers Effect is set to a non-color attribute.
Filler Alpha: Determines the alpha value of the texture between the Cells. This alpha value will ramp to the Filler Alpha value. The Alpha option is used in conjunction with the Color setting.
Type: The Type popup allows you to quickly change between the styles of Cellular texture. The options are 'Round' and 'Angular'. These options determine how the texture interpolates between its sample points.
Angular-- This option creates a somewhat linear interpolation between the sample points in the texture which results in an effect similar to cobblestone in the default setting. This mode can be used to generate effects ranging from lunar surface to craggy skin.
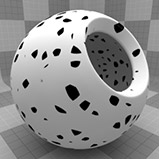
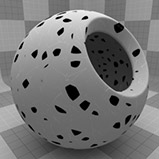
Round-- The Round type of cellular texture creates circular spots randomly distributed based on the texture. In the default settings the texture looks simply like overlapping soft edged dots. Adjusting the settings can yield effects ranging from cauliflower to chipped rock.
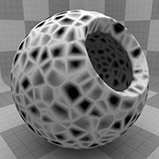 Type Angular | 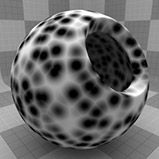 Type Round |
Cell Width: This setting determines the maximum scale of the texture details. At 100% the maximum scale of any single detail in the texture would be equal to the Texture size as set by the texture locator size values. If you want to change the scale of the details of the texture this is the value to use. To set the overall scale of the texture you will modify the texture scale on the Texture Locator tab.
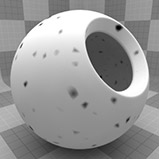 Cell Width 0% | 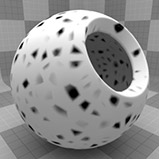 Cell Width 25% | 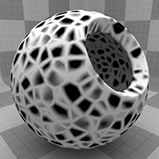 Cell Width 50% | 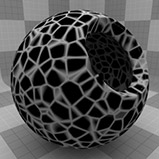 Cell Width 75% | 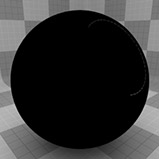 Cell Width 100% |
Transition Width: This value controls the amount of gradient falloff around each of the texture details. Driving this value over 100% can also yield interesting effects.
Transition Width 0% | Transition Width 25% | Transition Width 50% | Transition Width 75% | Transition Width 100% |
All "noise" style procedurals can be "layered" to create a fractal effect. The traditional style of fractal includes layering a noise pattern multiple times with each new layer increasing in frequency (smaller details and more of them) and fading in opacity value. When you add a Cellular or Noise texture in MODO the default settings are not "fractal" in that they use a default Frequency value of one, this means there is only one layer of the procedural effect. Adding multiple frequencies will create a more fractal look to the texture and will invoke the 'Frequency Ratio' and 'Amplitude Ratio' controls.
Frequencies: Determines the number of virtual layers used by the procedural. When set to less than 2, the 'Frequency' and 'Amplitude' Ratios are disabled. Adding more than one frequency increases the detail in the procedural texture which increases computation times.
 Frequency 1 |  Frequency 2 |  Frequency 3 | 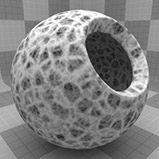 Frequency 4 |  Frequency 5 |
Frequency Ratio: The Frequency Ratio determines how much detail to add into each additional application of the noise texture when the Frequencies value is set to a value greater than 1. With a value of 2, the result will be the second frequency of the texture being twice as high as the first. The visual effect of this is a pattern that seems to be half as large but with twice as many occurrences. With more than 2 frequencies each additional "layer" of the noise will have twice the frequency of the last.
Amplitude Ratio: This value determines the strength of each additional "layer" of noise when frequencies are greater than 1. By default the setting is at .5 which yields an effect where each additional set of frequencies have half the value of the previous.
Value Variation: The 'Value Variation' percentage allows you to randomly vary the brightness or luminosity of each individual cell. Higher numbers will increase the differences between cells while lower ones will have decreased brightness variations.
 Value Variation 0% | 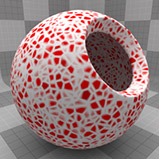 Value Variation 25% | 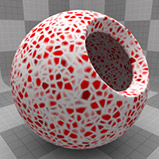 Value Variation 50% | 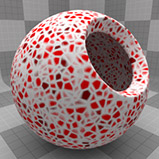 Value Variation 75% |  Value Variation 100% |
Hue Variation: The 'Hue Variation' percentage allows you to randomly vary the hue or color of each individual cell. Higher numbers will increase the color differences between cells while lower ones will have decreased color variations.
Hue Variation 0% | 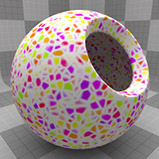 Hue Variation 25% | 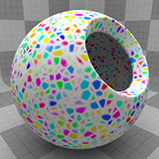 Hue Variation 50% | 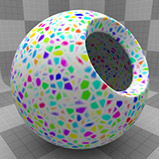 Hue Variation 75% |  Hue Variation 100% |
Saturation Variation: The 'Saturation Variation' percentage allows you to randomly vary the color saturation of each individual cell. Higher numbers will increase the differences between cells while lower ones will have decreased saturation variations.
Sat. Variation 0% |  Sat. Variation 25% |  Sat. Variation 50% |  Sat. Variation 75% | 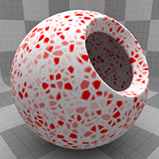 Sat. Variation 100% |
Bias: Increasing this value will cause the texture to favor the Cell color or value over the Filler whereas decreasing the value causes the Filler color or value to be favored.
 Bias 0% | 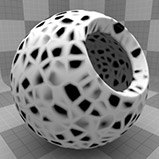 Bias 25% | 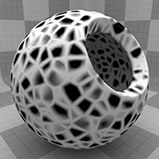 Bias 50% |  Bias 75% | 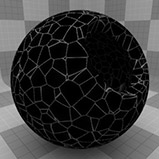 Bias 100% |
Gain: The Gain setting is similar to a gamma control that effects the falloff of the gradient ramp between the cell and filler values. Setting the Gain to 100% will create a very sharp falloff effect whereas setting the value to 0 would create a plateau around the value or color mid-point with sharp falloff on either extreme of the gradient.
 Gain 0% |  Gain 25% |  Gain 50% |  Gain 75% | 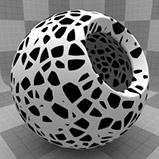 Gain 100% |

