
Effectors are a means to affect a target item, specifically a Mesh layer, deforming it in specific ways. The 'Slack Effector' when assigned to an item will deform the target as if suspended between two points. As the two points move closer together, the deforming element in between will sag and droop, retaining its overall initial length; this can be visualized as a rope holding a boat to a dock, as the boat drifts back and forth the rope will droop and stretch between the boat and the dock, but always retain its overall length.
Applying an Effector
While simply adding an Effectors with the 'Add Items' option is possible, placing the appropriate Effector in the Items list, it won't produce the expected results, as the Effector, being a separate item, need to be connected to the Mesh layer by way of a 'General Influence'. The General Influence acts upon the mesh, while the Effector itself produces the instructions on how the Influence should modify its target.
Items meant to be deformed by a 'Slack' effector require a little bit of initial setup to produce the intended result. First, the target item should be long and skinny in nature, like a rope, bar or chain links, and be a single Mesh item layer aligned with one of the three axes (X,Y or Z). Second, two additional Locator items need to be positioned at both ends, representing the start end end of the mesh. To automatically connect the Effector to the target, next select it in the Items list and then RMB+click on the layer, opening the contextual menu and then select the "Add Deformer > Effectors > Slack Effector" option. This creates the Effector not as an Item in the Items list (as others do) but Creates a special 'Group'. Next, users will need to select the 'Slack Effector' Group and the two previously created Locators, and them RMB+click on the 'Slack Effector' Group name and then select the "Add Items" command from the contextual menu. Once the Locators are added to the Group, the Slack Effector will immediately affect the target mesh. Within the 'Properties' viewport panel, users can adjust the related attributes.
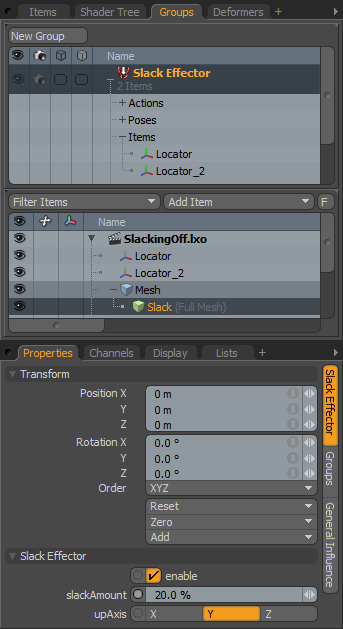 Name: This data field displays the current item name. Users may easily change it by LMB-clicking within the field and typing the new name.
Transform--
Position: An Item transform that allows the user to numerically position the Effector item in XYZ space, though this has no affect upon the resulting deformations.
Rotation: An Item transform that allows the user to numerically set the rotation of the Effector item, though this has no affect upon the resulting deformations.
Order: Allows the user to set the order that rotations are applied to the Effector item.
Scale: An Item transform that allows the user to numerically set the size of the item representation in the 3D viewport, though this has no affect upon the resulting deformations.
Reset: Resets the selected transform values to (0,0,0) returning the item back to their default state.
Zero: Resets the chosen transform property values to '0', leaving the 'Center' position and Mesh position intact. This is done by adding a negative transform item to the Mesh items channels.
Add: The 'Add' function will add the selected set of transforms to the channel list. Useful when animating complex motions, providing a layered approach to the transforms.
Slack Effector--
Enable: Toggles the effect of the layer on or off. When unchecked (disabled), the layer has no influence on the scene. However, disabled layers are still saved with the scene and its values are persistent across modo sessions.
Slack Amount: Determines the amount of droop or sagging between the two Locators. Users can also move the end Locators to increase or reduce the amount of drooping/sagging.
Up Axis: Gravity always pulls downward in the real world (Y axis in modo space), but not all scenes are meant to simulate the real world. Users can adjust this setting to assign which axis direction the deformations is meant to be applied on.

