
'Baking' is the process used to pre-compute texture and lighting information. The result is often used for real-time applications (such a for games) or for exporting models into other software packages with complex shading intact, or simply as a way to eliminate rendering overhead in elaborate scenes. In this way shaders and lighting are computed by the MODO rendering engine and baked directly into an image that maps perfectly to an existing UV texture.
|
|
|

Depending on what your intended purpose is, there are a couple of methods for baking images. If your intent is to simply merge (flatten) multiple shader tree layers, then all that is needed is an image map added to the shader tree set to the appropriate 'Effect' type before baking. When baking maps such as Displacement and Normal maps, two layers of geometry are necessary, typically one is the high resolution model comprised of all the details of the final model, and a second low resolution model that approximates the shape of the high resolution model that serves as the baking target. The low resolution geometry requires a proper UV map with a unique name (unique from any UV maps assigned to the high res version). Additionally, users will need to make sure the applicable layers are selected in the item list, and that the appropriate UV map is also selected. When Baking to Textures, suitable image maps must be placed and selected in the Shader Tree (Don't worry, it only sounds complicated, each set-up is detailed below). For information regarding adding layers and setting their 'Effect', please reference the 'Shader Tree' page of the documentation. All of the baking commands can be invoked from the menu bar within the 'Render' menu. They are as follows-
The command 'Bake to Render Outputs' gives users the ability to use a UV map from a surface to generate a rendered image that can be applied back to the surface as a texture map. Utilizing the functionality of the Shader Tree's 'Render Outputs', this allows the baking of Ambient Occlusion specific texture maps, Diffuse Coefficient maps, or even baking a Final Color map that fully computes all surfacing and shading of the target item. Once rendered, images can be saved to disc from the Render Display viewport, then imported and applied back to the geometry.
Before baking it is important to select the target item in the 'Items' list or 3D viewport and to additionally select the target UV map in the vertex maps 'Lists' viewport. In the Shader Tree, render baking will use the settings from the 'Render Item' to determine bake quality and Frame Size settings. Additionally, an offset amount is applied to the final pixels to reduce or eliminate possible seams at UV borders edges. The border offset amount is calculated by an Alpha channel that must be rendered concurrently with the main render output. The amount of the border offset is determined by the 'Bake UV Border Size' setting in the Preferences.
In a default scene the Render Output is set to 'Final Color', users can RMB+click on the effect type in the 'Effects' column of the Shader Tree and define an alternate render output style. Once the target items are selected, invoking the command "Render > Bake to Render Outputs" will render all active Render Outputs simultaneously.
Bake from Object to Render Outputs--
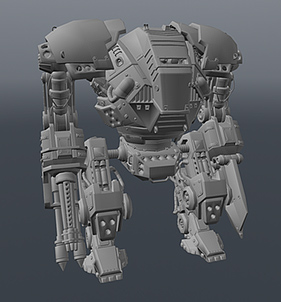
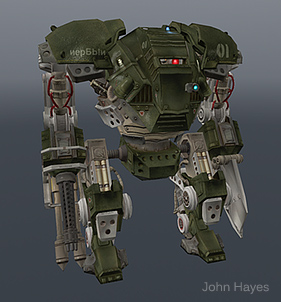
The 'Bake from Object to Render Outputs' command is similar to the 'Bake to Render Outputs' command above, however it allows the additional ability to generate its results using an alternate mesh layer. It is essentially transferring the surfacing from one object to another. In this setup, typically, one layer is a detailed, high resolution mesh and the target baking mesh layer is a lower resolution mesh, approximating the overall shape of the high resolution layer. This is often used in games, where the detailed surfacing from the high-res asset is applied to the low-res assets to give the overall visual impression of higher resolution in the final model. Once rendered, images can be saved out from the Render Display viewport, then imported and applied to the target geometry.
Baking from an object requires a background mesh layer (visible in the Items list, but not selected) and a foreground mesh layer (selected and visible). The background layer would typically be the high resolution model layer to extract the geometrical, shading and lighting information from and the foreground layer would be the low resolution model layer with a UV map to apply those baked maps to. In the Shader Tree, render baking will use the settings from the 'Render Item' to determine bake quality and Frame Size settings. With the Foreground and Background layers properly referenced, select the uniquely named UV map in the Lists viewport and select the command "Render > Bake from Object to Render Outputs", opening a dialog where the user defines an offset 'Distance' that should encompass all surface differences between the two mesh layers. Pressing 'OK' will render all active Render Outputs simultaneously.

IMPORTANT: When baking from a background object to a foreground object, both object layers must have unique UV map names. Collisions will occur if the default 'Texture' name is present on both layers, causing errors or the bake will not produce any results at all.
The command 'Bake to Selected Texture' can be found in the menu bar under 'Render > Bake to Selected Texture', but is is more commonly summoned from the Shader Tree directly using the RMB contextual menu (opened by clicking on the target layer) where it is called "Bake to Texture". This command offers the ability to generate a bitmap texture of one or more Shader Tree texture layers, when all layers share the same 'Effect' type. The common uses for the function are to convert a procedural texture layers to a bitmap for displacement freezing, or to combine complex, multiple Shader Tree layers into a single layer. It can also be used to pre-compute render intensive effects, such as Occlusion, saving render time and eliminating frame to frame variances that may occur.
Baking to the Selected Texture will require that users first define a new 'Image Map' layer in the Shader Tree. During this process, the file save location is defined, as well as the Resolution and Bit Depth. For information on creating Image Maps, please reference the Add Images page of the documentation. The Texture Locator settings are used to determined the appropriate UV map for baking, so make sure the image is applied appropriately. The position of the layer within the Shader Tree is important as well, because only layers below the target will be evaluated for baking. Once the 'Effect' has been defined for the layer, it will also be necessary to disable the layers visibility (by toggling the eye column) to ensure the target baking layer itself won't get evaluated as part of the bake. Then RMB+clicking on the layer, opening the contextual menu and selecting the command "Bake to Texture". Once generated, the image will need to be saved using the menu bar command 'File > Save Image'.
Bake from Object to Selected Texture--
The command "Bake from Object to Selected Texture" can be used to generate two specific types of texture maps using the foreground and background mesh layer functionality described in the "Bake from Object to Render Outputs" section. Specifically, the function is used to generate Displacement and Normal maps. A Displacement map is a grayscale image that represent the difference in position between a low-resolution foreground mesh and a high-resolution background mesh, a Normal map uses color to represent the difference in the surfaces Normal facing direction. Both maps, once generated, can be applied back to the lower resolution geometry to give the impression of much greater resolution.
Baking from Object to Selected Texture first requires a background mesh layer (visible in the Items list, but not selected) and a foreground mesh layer (selected and visible). The background layer would typically be the high resolution model layer to extract the Displacement or Normal information from and the foreground layer would be the representative low resolution model layer with a UV map to apply those baked maps to (and a morph map offset from the surface when using the 'Cage' option). In the Shader Tree there also needs to be an appropriate target bitmap texture layer with the proper 'Effect' defined for the intended purpose (either as 'Displacement' or 'Normal') applied to the foreground mesh. The associated Texture Locator settings are used to determined the appropriate UV map for baking, so make sure the image is applied correctly. It will also be necessary to disable the texture layers visibility (by toggling the eye column) to ensure the target baking layer itself won't get evaluated as part of the bake. Then RMB+clicking on the layer, opening the contextual menu and selecting the command "Bake from Object to Texture" will open the following dialog box-

In this panel users define the 'Cage' vertex map or a 'Distance' value; these represent the offset distance away from the limit surface. The 'Cage' setting is used when baking Normal maps exclusively; with it users can define a Morph vertex map (the cage) for the surface normal evaluation. This 'Cage' is a specially created Morph Map on the baking geometry, where the morph surface is typically offset from the limit surface and represents the ray distance using the difference between the morph position and the undeformed position of the surface. When specifying a cage, the 'Distance' value should remain at 0 (zero).
When no cage is specified, the 'Distance' option can be used with either 'Displacement' baking or 'Normal' map creation and represents the maximum ray travel amount, both positive and negative from the baking surface and should be set to encompass all surface deviations between the two surfaces. (Black regions in the bake result represent areas beyond the defined distance and should be increased to eliminate them). Setting the value too high can reduce accuracy and may introduce errors, depending on the geometry. Pressing 'OK' will initiate the bake. Once generated, the image will need to be saved using the menu bar command 'File > Save Image'.
Note: Users must make sure that the Normal Map layer in the Shader Tree is not in the same mask as the item you are trying to bake from.

TIP: Depending on the type of geometry, and the resolution of the baked image, UV border seams may be visible. These can be eliminated by the using the 'Bake UV Border Size' option of the Preferences (menu bar 'System > Preferences', listed under Display > Rendering section). In order to take advantage of this functionality, users must have an active 'Alpha' Render Output as well, as MODO uses the information of the alpha to compute the border offset.
MODO has multiple features that work by way of virtual geometry, meaning that the geometry in the scene that the user interacts with isn't the real geometry that is used to render, such as Subdivision Surface models, Displacement, Render Curves, Fur and so on. When pressing 'F9' MODO takes the instructions for each feature and converts them to real geometry for the final rendering. This procedurally generated geometry for rendering can be baked into real Mesh items in a scene, making it possible to apply complex procedural displacements or generate fur and bring it back to the scene as real geometry that can be directly edited or exported to other packages. The command is found in the menu bar under "Render > Bake Geometry Cache", selecting the command opens this dialog-
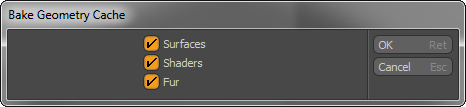
Surfaces: The 'Surfaces' toggle, when enabled will clone the surface settings of the original object into new Material Groups assigned to the baked geometry.
Shaders: The 'Shaders' toggle when enabled will clone the Shader settings per item of the original object adding it to a Material Group assigned to the baked geometry.
Fur: The 'Fur' toggle, when enabled will convert any Fur in the scene to geometry. If the Fur is set to 'Strips', it will be converted to polygons. If the fur is set to 'Tubes' it will be converted to individual Curves, representing each individual fiber. (Note that the Curves for Fur can be further converted to polygons using the 'Render Curves' command and invoking a second pass of the Bake command)
Running the command converts all Mesh Item layers in the scene, as well as Instances and the procedural effects Fur, Render Curves, and Replicators. Mesh Density is based on the settings for each individual item (exactly as it would tessellate for rendering). The resulting meshes will be a separate Mesh layer for each surface or effect in the scene. Note that special procedural effects, such as Volumes, Blobs. Render Booleans or Sprites cannot be converted to meshes.
TIP: Depending on the complexity of the scene, it is possible to create scenes of immense size using the 'Bake Geometry Cache' command, the render statistics panel gives a readout of the total scene geometry during each render as a useful guideline. Users wishing to modify only single elements can do so by saving individual Mesh layers out by RMB+clicking on the layer in the Items list and selecting the 'Save Selected' command, and then opening the resulting file and applying the 'Bake Geometry Cache' command.

