
MODO follows a series of user interface (UI) conventions across the application that may be different from what some users are accustomed to, but provide a very intuitive and fluid platform for users to accomplish their creative vision. Understanding of these conventions is the first and most logical step in utilizing MODO to its fullest potential.
General User Interface Controls & Conventions
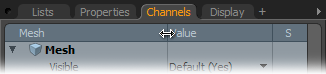
Menu Bar

The Menu Bar (highlighted above in red) provides users with quick access to virtually all of MODO's core tools. LMB+clicking on any of the System Menu categories will activate a pull down menu with many entries and sub-categories for users to select from. The Menu Bar is actually composed from a standard MODO Attribute Sheet and can be customized through the 'Form Editor' found in the 'System' section of the Menu bar. Menu item names that display another dialog are followed by ellipsis (three dots).
Tabs

MODO organizes certain aspects of the interface into what are known as 'Tabs', because of their remarkable similarities to the flaps of paper hanging from filing folders made for organizing paper documents. 'Tabs' are a common and popular UI convention that help visually organize data. In MODO they allow multiple viewports to exist in the same layout (or to organize multiple layouts) and are a handy way to quickly get access to certain facets of MODO important only to a particular function. In some cases a viewport's display is dependant on information selected in another viewport, which may be *hidden* under a different Tab (such as item selection displaying their attributes in the properties viewport). Tabs in MODO do not auto-select, so users have the power to control what information they want displayed at a particular moment without the surprise of viewports suddenly changing. User need only to simply LMB+click directly on a Tab to open it for display. When a Tab is active, the Title changes from a light gray to an orange color. Background tabs are a darker gray color.
Buttons
MODO displays commands and state for many functions as 'buttons'. Buttons may exist as an icon, as an icon and text or as just text (and any available keyboard shortcut, if applicable). These buttons appear throughout the interface, but mainly in the toolbox down the left side of the default interface. Users may LMB+click on a button to select the function, when active the button highlights in orange indicating its selected (active) state. For certain buttons, like tools, they may be de-activated by LMB+clicking the tool button again or pressing the 'Q' or 'Esc' keys to drop the tool. For state buttons, such as the mode buttons, users cannot deactivate the state, but may choose an alternate button to change to a different state.
Button Popups
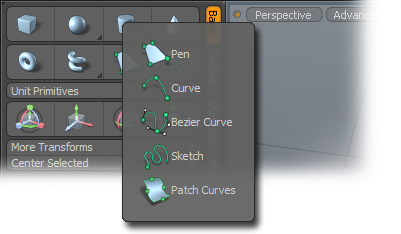
A Button Popup is a button that displays a secondary list or window. In the toolbox, these buttons are separated by a small gray arrow pointing toward the lower right hand corner. To open, users can RMB+click on a popup button to access this list and make selections from it. Users can also LMB+click and hold to open the popup as well. The GL Viewport popups which allow for Viewport Type and Shading choices are special cases; the options list is displayed when users RMB+click the buttons in the GL viewports. Popup transparency can be adjusted by going to the menu bar "System > Preferences > Display > OpenGL > Transparency > Popups" and changing the percentage there.
Alternate Buttons
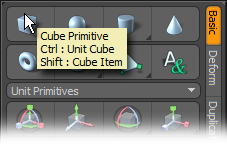
![]()
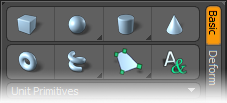
Buttons can be set to perform alternate actions based on key qualifiers. As the qualifiers are pressed and released, the buttons change to show the alternate commands. Alternates are also listed on tool tips. An example of an alternate action based key qualifier is the Boundary command. When the 'Ctrl' key is pressed, the Edge button in the MODO Modes toolbar displays 'Boundary' instead of 'Edges'. If the 'Alt' key is pressed instead, the Edges button displays 'Convert'. Another example is the use of the 'Ctrl' key with the Primitives. Pressing the 'Ctrl' key changes the display of the Primitive buttons, and clicking them will create a Unit Primitive of whatever type is pressed.
Item Selections
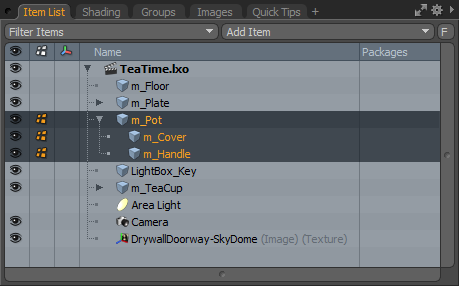
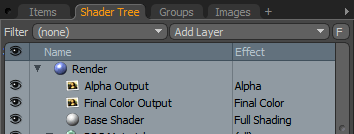
When working with any item or layer in MODO, users will need to tell MODO precisely which layer to work with, this is done by selecting the particular item. This can be done in the tree views of the 'Item List' and 'Shader tree', or in the list view of the 'Vertex Maps' viewport. To select a layer, users need only to LMB+click directly on the layer name. Selected layers are differentiated by the dark highlighting of the layer, with the layer name changing to orange. Selecting of multiple layers can be accomplished a variety of ways allowing for gang edits of multiple items. Users can select a series of items by LMB+clicking the top most item layer, and then pressing down on the "Shift' key and then LMB+clicking on the bottom most layer, selecting all the layers in-between. Non sequential layers can be selected by holding down the 'Ctrl' key and LMB+clicking to select the layers. Layers will automatically de-select when a new layer is selected, or individual layers can be removed from a selection by again pressing the 'Ctrl' key and LMB+clicking on the individual layers.
The first item selected will always be the primary selection, and it is separated from subsequent item selections by a slightly darker color and a slightly lighter layer name (it is subtle, but noticeable). This is an important function for recognizing ordered selections necessary for certain animation and item creation commands, such as when setting up Replicators.
Nesting & Hierarchies
Entries in a tree may have sub-entries, which may be expanded by clicking on an arrow icon next to the parent ![]() . One column indicates the nesting, and sub-entries are indented relative to their parent. Entries may also have attributes, which may be expanded or contracted by clicking on a plus/minus (+/-) icon next to the entry with attributes. Attributes are also nested under their parent, but for clarity attributes cannot themselves have sub-entries. Double clicking on the parent item will select all the children. 'Shift'+LMB clicking the parent arrow
. One column indicates the nesting, and sub-entries are indented relative to their parent. Entries may also have attributes, which may be expanded or contracted by clicking on a plus/minus (+/-) icon next to the entry with attributes. Attributes are also nested under their parent, but for clarity attributes cannot themselves have sub-entries. Double clicking on the parent item will select all the children. 'Shift'+LMB clicking the parent arrow ![]() will unfold/open all subsequent nested/child item layers simultaneously.
will unfold/open all subsequent nested/child item layers simultaneously.
Inline editing
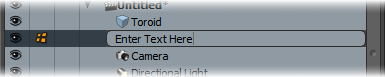
Text fields can be edited inline wherever possible. In particular, text fields in trees that users can alter, can be edited directly in place. To edit text users should LMB+click to select the text, pause, and then LMB+click again to convert the text to an inline edit field. Once converted, users can simply type in the new name and press 'Enter' to set the new name.
Boolean Buttons
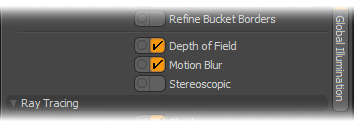
Boolean buttons (aka Checkboxes) act as simple toggles to allow users to set the enabled/disabled state of any option. They appear as small gray squares when the state is set to disabled. Upon enabling the button by LMB+clicking on the square area, it becomes highlighted in orange and a black check mark appears in the square. LMB+clicking the button again toggles to the previous state.
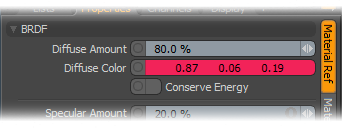
MODO has unique color selection behavior. In any color swatch, three numbers are displayed, by default, each a floating point value between 0 and 1. Each value represent individual RGB color settings. Users can LMB+click and drag on any of the numbers to directly modify the color, which is displayed interactively in the background of the swatch as the mouse moves. Additionally, holding down a key will allow modifying all three values at once--
'Shift'+LMB+drag = Brightness
'Ctrl'-LMB+drag = Hue
'Alt'-LMB+drag = Saturation
Or, simply LMB+clicking anywhere on the color swatch itself will open the color picker. Pretty slick, huh?

TIP: The default floating point color system can be changed using the preferences dialog. In the menu bar select "System > Preferences..." and in the preferences viewport select 'Input > Accuracy and Units'. Here users can modify the 'Color Unit System' to 'Floating Point' (0 - 1), 'Percentage' (0% - 100%), 'Integer' (0-255), and 'Hexadecimal' (00 00 00 - ff ff ff).
MODO provides a function that allows users to use simple search strings to aid in locating layers in a list viewport, such as the 'Items' list or 'Shader Tree'. It is located toward the top right of the viewport as a small "F" button, where users can LMB+click on the button to open the filter input field. Text is then input onto the value field same as elsewhere by simply LMB+click on the input field to set focus and then typing on the keyboard. As users type strings of text, the viewport will update to display the results of the search. Users can then select a layer and LMB+click the "F" button again to hide the search options (if desired) returning the list view to normal, with the layer remaining selected. Users can select two modes for the search with the pop-up menu, either 'Simple Search' or 'Pattern Matching'.
When searching the in the Clips list (images viewport), the original filename is considered, for other viewports, the actual layer name is considered. When the 'Match Case' toggle is enabled, the search will consider the letter-case of the text. For users who prefer a flat display of the list results, the 'Flat' button can be toggled to allow easy view and selections of multiple layers.
Contextual Popups

The various Viewport (including the 3D view and UV edit views) display popup option lists when users RMB+click within the viewport as well as in the header. Here users can apply functions to that particular viewport, activate certain tools, and affect selections within the viewport; all dependant on the mode, and over what element in the interface the particular RMB+click occurred. If there is no option available, then right-clicking does nothing; the menus only appear when the context is correct. For example, RMB+clicking on the Model tab of the MODO 3D viewport window displays a list of options that can be chosen to change the viewport into something other than a modeling viewport and RMB+clicking in the viewport while in polygons mode offers a number of choices to affect the viewport and geometry selections.
| 
|
|---|
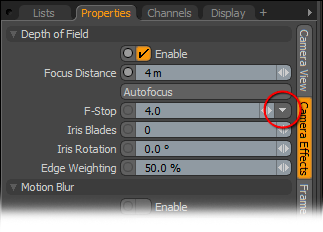
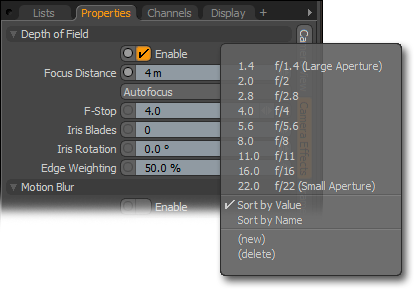
Value Presets are the small white downward facing arrows that appear on the far right hand side of many numeric entry fields. By LMB+clicking on the arrow users can open a mini popup window for selecting and saving often used values. The values presented within each property are specific to that particular property, meaning you will only see the F-Stop values in that particular field. Simply clicking on any of the values when highlighted will insert that particular value into the associated data field. Users can use the '(new)' command to create a preset, and the '(delete)' commands to remove any values from the popup. Once a value is created, it is saved to MODO's config file.
Numeric Entry Fields and Minisliders
Numeric attributes can be edited directly inline by simply LMB+clicking directly on the value, converting it to an inline edit field, a second click sets the insertion point, then with the keyboard, users can enter a new value, then pressing 'Enter' to accept. Numeric properties can also be modified interactively via the 'Mini-sliders', the small white arrows that appear on the far right hand side of most numeric entry fields. By LMB+clicking and dragging on the Minisliders, users can quickly increase (dragging right) or decrease (dragging left) the current value in the field. Values can be stepped by simply clicking on the right or left side of the slider; click on the right to increase the value, click on the left to decrease it. The minisliders also have a system of detents that cause tiny pauses to numeric values as users drag over "nice numbers" such as 100% or 180°. Depending on the input the values are:
angles, major: 0, increments of +/- 90
angles, minor: increments of +/- 30 and +/- 45
percent, major: 0, increments of +/- 100%
percent, minor: increments of +/- 25%
distance, major: 0, powers of 10
distance, minor: nice grid increments
float, major: 0, powers of 10
float, minor: multiples of 2, 2.5, 5
This is very useful for quickly and accurately dragging out a value. Holding the 'Shift' key while using a Minisliders will increase the speed a value is incremented by a factor of 10, while the 'Ctrl' key will reduce the speed by a factor of 10.
Users can gang edit all three fields simultaneously as well, by LMB+Clicking the ![]() to the left of the mini-slider enabling the feature.
to the left of the mini-slider enabling the feature.
The first click changes the field ![]() 'Copy', identical value are applied to all like controls.
'Copy', identical value are applied to all like controls.
The second click changes to ![]() 'Relative', value change is added to all like controls.
'Relative', value change is added to all like controls.
The third click changes to ![]() 'Proportional' where value changes are applied proportionally to all like controls.
'Proportional' where value changes are applied proportionally to all like controls.
A fourth click returns the feature to ![]() 'Independent', controls are edited independently.
'Independent', controls are edited independently.
When entering numeric values, users can use keyboard equivalents as well-- 'Ctrl'+'Alt'+'Enter' for Copy, 'Alt'+'Enter' for Relative and 'Ctrl'+'Enter' for Proportional.
TIP: Numeric entry fields allow users to enter simple equations and the value is computed automatically. This allows for very simple calculations without using a calculator. Example: Perhaps you wish to use the Clone tool to create 7 copies of the original mesh, each with a small amount of rotation so that by the seventh clone their total is 360 degrees. Users can simply enter 360/7 in the Rotation numeric entry field. When pressing 'Enter', MODO will handle the calculation and the resulting 51.4 degrees will be in the field. Accepted symbols are / = divide, * = multiply, - = subtract and + = add.
Pie menus are quick contextual popup menus that appear using keystroke combinations. Menu items are laid out in a wheel so users can access them gesturally for speedier workflow. By default, when a key combination is invoked to recall a menu, the menu opens instantly, Users can adjust this behavior with the preference setting "System > Preferences > Input > Remapping" with the 'Open Pies Immediately' toggle. When disabled, opening Pie Menus will require the keyboard key combination and a LMB+click over any viewport to open. User configured pie menus are created using the 'Forms Editor'. Note that pie menus are limited to only 8 items. The first 8 items that appear in the Forms Editor are used for the pie menus, including disabled items. The keyboard shortcuts page references the various default menus available.
Popover Window
Any type of viewport or content may be opened as a popover. Once activated, interaction can happen normally in the window. Moving the mouse outside the popover bounds dismisses it. To see an example of a popover window, hold down ALT+Spacebar anywhere in the MODO interface. The Quick Access popover window displays, showing tools for Transforms, Selection, Center & Axis, Falloff and Tool Properties. Popovers can speed your workflow by putting the tools directly under your fingertips, such as pressing 'K' in a viewport to display the tool properties within the viewport.
List Columns
To facilitate the display of various types of information in a list viewport, data is organized into columns. The default column sizes may not always be a proper fit for the data they contain. Users can resize column widths by hovering the mouse pointer on the divider line until the cursor turns into two opposing arrows, then LMB+clicking the divider and dragging left or right will resize the column.
Hovering the mouse cursor over a button will display a Tooltip, a small text hint with the name of a function or tool, and keyboard equivalents if applicable. For certain commands, Tooltips also contain useful hints for using the function.
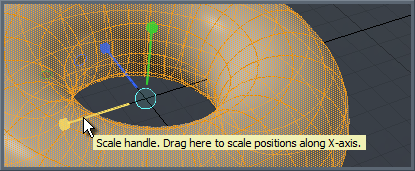
Hovering the mouse over any tool handle (when it is highlighted) will pop open a handle specific tooltip, often with instructions related to the function of the specific handle.
Hauling
Hauling is an off-handle click+drag action which controls one or two values of a tool directly in the viewport using the left/right, and possibly up/down motion of the mouse. Many tools have an advanced handle setting that displays hauling feedback in the form of lines drawn horizontally and vertically on the screen corresponding to the direction of mouse deltas. The lines are labeled, and will persist as long as hauling can be resumed. Clicking directly on a line highlights it and starts hauling for that parameter only.
Drag and Drop
MODO supports Drag & Drop behavior for loading object files and bitmap images. Since MODO is a multi-document system, each 3D object or project that users drag in will appear as its own document layer. When users drag and drop images, if dropping them onto geometry they will appear as a texture in a material. If you drag them into a 3D viewport, they will appear as a Backdrop Item. If you want to load a bitmap, but don't want to apply it to geometry or as a Backdrop Item, drag it into a non-3D viewport. Items can be dragged from the 3D views directly onto groups (where they become members of the group) or into the Schematic viewport. Channels can be dragged from the Channel List onto groups or into the Schematic.
Viewport Maximize & Restore
A Viewport may be maximized or minimized within a group to temporarily expand the amount of space given to a specific viewport. This is very useful when working in a quad view modeler layout as it allows you to quickly maximize a particular viewport, then restore back to the previous quad view state. By default this is mapped to the '0' (zero) key on the numeric keypad. To use, hover the mouse pointer over the target window and press '0'. The target viewport will maximize to full size based on the group where it is embedded. Pressing '0' again while hovering over the same viewport will return the viewport to its previous state. This can also be useful when working in long Item Lists and Shader Trees and searching for particular layers.
Floating a Window
Viewports can be torn off and converted into floating windows, or new floating windows can be created which can be manipulated like the main window. To float any window, simply LMB+click the thumb (the circular indentation at the upper left hand corner of the window) and drag the position of the window. The window is removed from its position in the interface and floats when you do this. To dock the floating window, just reverse the process. Click the thumb and then move the cursor back to the newly desired position in the interface, by hovering over a viewport frame edge. A yellow line will display indicated the new location of the window. Releasing the mouse button will dock viewport. Floating windows are persistent between sessions.
Context Help
User can access context sensitive help by pressing the 'F1' key or by choosing "Help > Activate Help" from the menu bar. The cursor changes into a question mark. Then clicking on a tool or UI element opens a page of related information will display in an HTML browser window. For complete help information, go to the menu bar and choose "Help > Documentation > Inline Help System". This displays the main index page of this documentation. If you still need help, you can visit The Foundry community forum (thefoundry.co.uk ![]() ) where users can directly post questions to be answered by expert users and helpful MODO fans everywhere.
) where users can directly post questions to be answered by expert users and helpful MODO fans everywhere.

