
Static Mesh items can streamline workflows where extremely heavy/dense meshes are used. Static meshes, as their name suggests are non editable, essentially frozen objects.
A good amount of memory and processing power is used in MODO so that objects can be edited; each and every vertex ready to accept any type of transform or modification. What happens when a mesh gets really dense, this overhead can bog down a scene file; adding a few items like this to a scene will in many cases substantially reduce viewport interactivity. A Static Mesh is a means to solve the issue by removing the overhead associated with editing a mesh, increasing overall performance and minimizing file size. Static meshes render just as any regular mesh would and can be positioned by regular item level transformations and can be used with replicators as well.
Static mesh's are made by converting regular mesh items. To convert, RMB-click over the mesh item layer containing the geometry you wish to convert in the item list, and select 'Change Type > Static Mesh' from the popup menu. Once converted, all component level mesh editing is disabled including morph maps, and deformers (which are removed). Subdivisions are frozen as well, converting any subdivided geometry into triangulated polygons. Basically, when converting to a static mesh, MODO is using the freeze command and then triangulating the model. Static mesh items were implemented mainly to facilitate the rendering of high-poly CAD data and dense organic geometry such as trees. For special cases where a mesh uses displacement maps, deformers and such, users may wish to pre-freeze the item prior to converting to static mesh by using the command on the menu bar 'Geometry > Freeze...' and selecting Freeze Displacement and Freeze Deformation in the popup dialogue.
For further editing, a Static Mesh can be converted back into a editable mesh layer, however, due to the freezing of the mesh's, some information will be lost.
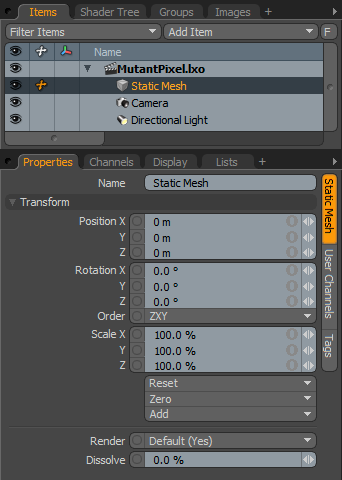 Name: This data field displays the current item name. Users may easily change it by LMB-clicking within the field and typing the new name.
Transform--
Position: An Item transform that allows the user to numerically position the item in XYZ space. By default, Position transforms originates from the Center position.
Rotation: An Item transform that allows the user to numerically set the rotation of the item. By default, Rotation transforms originate from the Center position.
Order: Allows the user to set the order that rotations are applied to the camera item. Changing the order that rotations are applied can sometimes help to reduce or eliminate gimbal lock.
Scale: An Item transform that allows the user to numerically set the size of the item. By default, Scale transforms originate from the Center position.
Reset: Resets the selected transform values to (0,0,0) returning the items back to their default state.
Zero: Resets the chosen transform property values to '0', leaving the 'Center' position and Item position intact.
Add: Transform Items are the channel groups associated to an item that store its transform values, controlling its position, rotation and/or scale. By default, new items do not have any transform items associated with them (even though they are visible here within the Properties panel). This is useful as an optimization as only the necessary transforms are added on an as-needed basis, reducing scene overhead. There are several ways to add them. One is by simply transforming the target item with one of the various transform tools (or by editing the values input fields). This action will cause the particular transform item to be added automatically to the 'Channels' viewport list. The 'Add' function here can also be used to add the selected set of transforms to the Channel list while keeping the default 0,0,0 values (a necessary step for 'Referencing', in order to override the channels, they must first exist).
Render: This drop down menu allows the user to select from 3 choices, when set to 'Default', the user can enable/disable mesh item using the visibility column (eyeball icon) of the item list. When the mesh layer is visible, it contributes to the final rendered scene and when invisible, it will not. On some instances the user may prefer to fix this state, setting the mesh as 'On' (enabled) or 'Off' (disabled) regardless of visibility. Also useful for workflows that auto toggle visibility, saving the user from manually enabling mesh layers for test renders.
Dissolve: The 'Dissolve' function controls the visibility of an item layer, at 0% the item renders normally, utilizing the shader tree settings, values above 0% would fade the visibility of the item layer ramping toward 100% where the item would be completely invisible.

INFO: Static Meshes cannot be used as point sources for Replicators, or as Dynamic objects as they produce no collision shape for the dynamics engine to calculate.

