
The Vertex Map tools provides users a way to adjust 'Vertex Color' maps and 'Vertex Weight' maps, interactively adjusting the target maps as the brush is dragged over the surface.
Using the tools
The Vertex Map tools is located in the 'Paint' interface tab, under the 'Vertex Map Tools' subtab of it's toolbox. In order to use the Vertex Map tools, users will first need to select the target Mesh item layer in the Items List. Users will also need to create and/or select a 'Vertex Color Map' or a 'Weight Map' in the Vertex Map list viewport. Please reference the 'Working with Vertex Maps' page of the documentation for information on creating vertex maps.
Upon selecting the tool, its attributes appear in the tool properties viewport. When first selected, the tool will also automatically select the brush tip, by default the 'Smooth Brush'. Users can select one of the alternate brush tips before proceeding or RMB+click in the 3D viewport to interactively scale the brush size. Users can then simply LMB+click and drag in the viewport to apply the brushes effect to the designated map. Pressing and holding down the 'Ctrl' key will typically negate the effects of the brush.
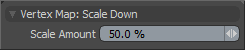 Scale Down--
The "Scale Down' tool will interactively adjust the values in a map down toward '0' (zero), sort of like slowly reducing the values toward '0' (zero). Pressing and holding the 'Ctrl' key will Scale Up the values. The overall effect is sort of similar to dodging and burning in an image editor.
Scale Amount: The 'Scale Amount' determines the strength of the scaling applied to the values.
Erase--
The 'Erase' tool will
remove any values in the target map that the brush touches. This isn't just lowering the value of the map to 0%, but completely removes the value for the vertex. No property form for this tool as there are no user adjustable values necessary.
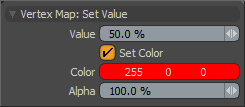 Set Value--
The 'Set Value' tool is sort of like the paint tool
combined with the erase too, in that it affects any vertex it touches 100% with no fading or attenuation. Pressing and holding the 'Ctrl' key will erase the value.
Value: When editing Weight Map values, this option determines the Weight Value applied.
Set Color: When painting onto Vertex Color Maps, this option is enabled automatically allowing users to specify a color to apply to the map.
Color: Defines an RGB value that is applied to the target Vertex Color Map.
Alpha: Defines an Alpha value that is applied to the target RGBA Vertex Color Map.

