
Effectors are a means to affect a target item, specifically a Mesh layer, deforming it in specific ways. The 'Lag Effector' when assigned to an item will deform the object along a directional vector, determined by the target items animation (essentially it will be deformed along the direction it is traveling). If the target item isn't animated, no effect will be visible. As the Lag values are increased, the greater the deformation will be.
Applying an Effector
While simply adding an Effectors with the 'Add Items' option is possible, placing the appropriate Effector in the Items list, it won't produce the expected results, as the Effector, being a separate item, need to be connected to the Mesh layer by way of a 'General Influence'. The General Influence acts upon the mesh, while the Effector itself produces the instructions on how the Influence should modify its target. This connection can be made automatically (while in 'Items' mode) by first selecting the target item(s) either in the Items list or any 3D viewport, and then RMB+clicking on the item, opening the contextual menu and selecting the menu option "Add Deformer > Effectors > Choose Type". Additionally, users can select the target item(s) and press the Effector button in 'Deformers' toolbox subtab of the 'Layout' and 'Animate' interfaces and produce the same result. Once the Effector is created, users can position the Effector and modify its values to produce the deformed results. When applied to multiple items, each item will be deformed by the single Effector based on its relative position to the mesh.
 Name: This data field displays the current item name. Users may easily change it by LMB-clicking within the field and typing the new name.
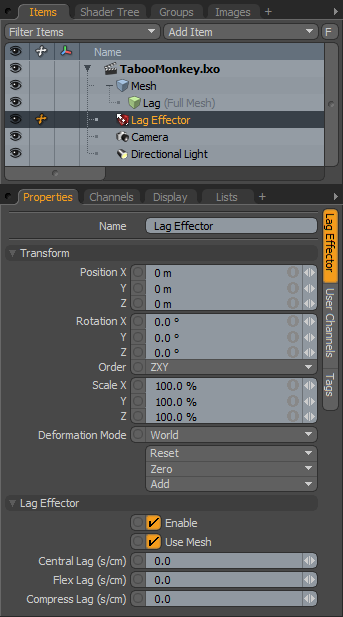
Transform--
Position: An Item transform that allows the user to numerically position the item in XYZ space. These values defines the origin of influence for the Effector.
Rotation: An Item transform that allows the user to numerically set the rotation of the item. These values defines the direction of influence for the Effector.
Order: Allows the user to set the order that rotations are applied to the Effector item. Changing the order that rotations are applied can sometimes help to reduce or eliminate gimbal lock.
Scale: An Item transform that allows the user to numerically set the size of the item representation in the 3D viewport. To adjust the scale of the arc's influence, disable the 'Use Length' option and scale the 'Radius' value.
Deformation Mode: The 'Deformation Mode' determines how the transforms of the Effector translate into a deformation-
World- This is the default setting and determines the deformation based on the world position of the effector. In most cases, this provides the expected results.
Local- This setting applies the deformation relative to the Setup position of the item as if the item were still at the rest pose regardless of the position of the Effector. Useful for the order of operation workflow when rigging.
Local ** Rotation Modes- Identical to the 'Local' mode but only the specified rotation is applied applying a deformation that is more like a Rotation Effector with Parametric interpolation.
Reset: Resets the selected transform values to (0,0,0) returning the item back to their default state.
Zero: Resets the chosen transform property values to '0', leaving the 'Center' position and Mesh position intact. This is done by adding a negative transform item to the Mesh items channels.
Add: The 'Add' function will add the selected set of transforms to the channel list. Useful when animating complex motions, providing a layered approach to the transforms.
Lag Effector--
Enable: Toggles the effect of the layer on or off. When unchecked (disabled), the layer has no influence on the scene. However, disabled layers are still saved with the scene and its values are persistent across modo sessions.
Use Mesh: When enabled, this option sets the Lag effector to use the center of the mesh it is deforming, instead of the position of the Lag effector itself as the origin. It is not much different than parenting the effector to the mesh, but it is much easier.
Central Lag: This is the amount of time by which a point 1cm from the center will lag behind the center, so it is the amount of time lag per cm distance from the center.  The distance is the absolute distance from the point to the origin location, be it Leg effector position or the Mesh's Center.
Flex Lag: Similar to the 'Central Lag', this is also the Lag amount per cm, but the distance is only the distance perpendicular to the line of motion (vector).
Compress Lag: This is the lag amount per cm, but the distance is measured only along the line of motion, giving a stretchiness just along the motion.  The 'Flex' and 'Compress' lag amounts are components of the central lag, so by combining them in different levels, you can get good control over how motion deforms the mesh.

