
Model Setup for Animation
So your object is modeled, you've surfaced it and set it up in a scene and added lights. The next step is to bring it to life with animation. In order to ensure the smoothest animation workflow in modo, there are a number of basic concepts one should clearly understand before proceeding. modo has a number of modes for editing mesh items -'Vertices', 'Edges', 'Polygons' and 'Items'. In most default layouts, these modes are displayed across the top of the screen, right under the menu bar.
modo modes
![]()
Hitting the space bar on your keyboard will toggle through the first three modes -'Vertices', 'Edges' or 'Polygons'. When in these modes, applying any type of transform -position, rotation, or scale, you are editing the raw geometry that makes up your model, in modo, these are called component level transforms. Now, you may have noticed that regardless of where you position the geometry in a mesh item layer, the center position for that item in the properties panel will always rest at 0,0,0.
Now if you select the 'Items' mode, and apply some transforms, you are now applying an item level transform. You can see that as you move the object in 3D space using position, rotation or scale, the values in the items properties panel are now changed from something other than 0,0,0. You can no longer affect individual vertices in item mode, as you are manipulating the layer as a whole. This is how objects are animated (and positioned*) in modo, by applying item level transforms. (For more on the Mesh Items properties panel, please reference that page of the documentation) It can become confusing as the same tools for move, scale and rotate are used for transforming items in component and item mode, but if you keep an eye out for which mode you are in, it will soon become second nature.
Mesh Items and Layers
When modeling objects, it is convenient to think of mesh items as layers, especially when using tools like booleans that use background layers for cutting and utilizing background constraints for modeling and retopologizing. You might be inclined, though, to keep all the elements of an object, say for instance a car, in the same layer. For still images, this is fine and works well. But each layer only has one center point, so it wouldn't be possible to animate that cars tires rolling as it moved without affecting the entire layer. It should quickly become obvious that each tire will need its own separate layer as each would need its own position and rotation to animate properly. Really, any part of the car that you want to move independently from the cars body itself would need its own layer -doors, hood, trunk. Once you've placed all the appropriate geometry in its own layer, each has now become its own mesh item.
Hierarchies
Now that the various individual mesh items have been successfully created for the make-believe car, how does one move the whole thing around in the scene? It's far too cumbersome to select each individual item in the viewport or item list, it's also prone to errors. To ensure all the elements remain together when moving the cars, we need to create a hierarchy. Hierarchies are groups of items that define how each element relates to other elements. Creating hierarchies are covered more fully in both the Item List and Animation Setup documentation sections. For simplicities sake here, we can just create the most basic modo hierarchy - a group. By selecting all the elements of the car and using the keyboard shortcut 'Ctrl-G', we have placed all the mesh items into a group (folder icon in the item list). If one wants to easily move the entire car and have its individual parts follow along, one just needs to select the top most group item (in this case, the group locator) and apply a transform to it, all the related items in the group will follow along. Another benefit of creating a hierarchy is that it nicely organizes the item list, especially important when building up complex scenes..
modo provides two methods for setting the point around which an item rotates and scales, Centers and Pivots. You may be familiar with pivots from other applications; modo's pivots can be used in the same manner. However, modo also provides Centers which in the many situations are used instead of pivots.
Center: This is the local origin of the model and the default location around which item transforms originate. It's the location that sits at the world origin when all the item transforms are at their defaults, i.e. when the item has not been moved, rotated or scaled in Item mode. Adjusting the Center of an item allows you to set the location around which the item will rotate and scale.
Pivot: Pivots also provide the ability to specify the location around which an item will rotate and scale. They can be used when one needs to animate this location (say a cube rolling across the floor for example), as Centers cannot be animated. The Pivot is specified as an offset from the item's Center and once set, the rotation and scaling occurs around this offset instead.
So, now consider the make believe car again, having modeled the entire object in a single layer the individual mesh items were then created by copy/paste functions from layer to new layer. While each item now has its own Center, the default location for them is at the world origin. If you were to try to animate the cars tires when created this way, you would find they don't rotate as one might expect, they probably rotate from a point originating somewhere under the center of the vehicle, sending the tire out into giant crazy circles; centers don't default to the center of the geometry bounding box. The alternative could have been to model the tire separate from the car at the origin, and use an item level transform to then move the tires to the proper position in the wheel well but luckily modo doesn't care how the item was created and can easily reposition the center point without affecting the geometry itself.
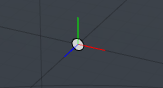
If one clicks and holds for a moment over the 'Items' mode button, a popup appears allowing for some alternate mode selections. By clicking on 'Center' you are now in a mode that allows you to edit the location of center positions without affecting the location of the original geometry in any way. So, by making sure the tire mesh item is selected in the item list, we can now see a small circle with the three lines coming out from it, this icon represents the center of our items layer. By clicking on the center icon itself (the white circle), it will turn orange, showing that it has been selected, now the 'Move' (W) and 'Rotate' (E) transform tools will affect the Center point. You could move it and eyeball it into the center of the wheel, or you could use a trick with the Work Plane that is much more precise.
Switching back for a moment to 'Polygons' selection mode, there should be some type of selection that could be made that would represent the position from where the wheel should rotate from, make this selection and use the 'Align Work Plane' command from the menu bar "Edit > Work Plane > Align to Selection". Now switch back into 'Center' mode and select the center again. In the Animate Setup tab there is a command called 'Set to Work Plane', click it, and that will move the center to the origin of the workplane which was precisely aligned to the center of your previous polygon selection. Reset the Work plane by pressing the 'End' key and everything is back to normal, but the Center was precisely positioned with no guessing or eyeballing required. Now when one animates the tire, it will rotate around the proper location. Just like in modeling there is a process to getting the best results, animation requires a bit of setup, but once one understands the basic setup techniques, it eventually becomes quick and easy.
Animating Workflow
Once the model is set-up (also referred to as rigging for more complex setups), you are ready to start animating. Making anything occur over time in modo requires a keyframe. A keyframe simply sets a specific value for an elements in time, be it a position, or a surface setting or whatever. Nearly any setting in modo can be keyframed to change over time. In traditional 2D cartoon animation, artists draw the important poses for an animated sequence, and then another artist, called the in-betweener, draws all the subsequent frames that transition from one pose to the next. Animating in 3D is very similar, where users set up the key poses (or positions, or settings) but unlike traditional animation, modo takes care of all the in between frames for you.
In modo the general workflow is to select the type of element you want to work with and then run a tool or fire a command that will affect your selection. Select a vertex, activate the move tool, move it, that kind of thing. Keyframing is similar in modo, in this case the type of 'things' you are working with are channels. Channels are simply the animateable properties of any item.
When you press the 'Key' button ('s' shortcut key) modo needs to know which channels you want to create keys on. It does this by using channel selections, it runs through each channel you have selected and creates a keyframe on that channel at the current time. Selecting channels can be done in a couple of ways, by clicking on them in a 'Channels' viewport or by clicking on the control label on a properties form, the small gray circle that precedes an attribute in the properties panel, when users click on the dot, it will change from gray to red signifying a keyframe is set at that point in time for that property.
Constantly selecting channels to keyframe would quickly become tedious so modo provides some 'Auto Key' behaviors to help with this. These are set with the 'Auto Key' menu at the bottom of the "Animation' interface tab. The default setting is 'Animated', with this on modo will automatically create keyframes on channels that are already animated (i.e. at least one key has been made on the channel previously) whenever the value on the channel changes. This can be by using the transform tool, using the mini-slider or by typing in a value on a forms control. If changes are made to a channel that has not been keyed the changes are still applied but keyframes will not be made. The next setting is 'All', and as it's name suggests this will create keyframes on any channel at the current time whenever it's value is changed. You have to be careful when using this setting and be aware of whether you're in animation mode or not as it's obviously very easy to create animated values when they may not be wanted. The last setting is 'None', this will never create keyframes automatically for you, to make keys you must use the 'Key' button whenever you've made changes.
Which setting you use is entirely up to the user of course, depending on how hey like to animate. Some people like auto keying, some people loathe it! The recommended setting is the default 'Animated' one, it provides a workflow somewhere between the two extremes of on and off and only requires the additional initial step of creating keys on the channels of the item you want to animate in advance.
The other area that modo tries to help with keyframing is automatic channel selection. Auto keying only works when channel values have changed, when you need to create a set of keys for channels without changing the current values you need to use 'Key' button (which requires the channels to be selected) or individually click on the channel buttons on the properties forms. To help with this modo will automatically select channels for you when using the transform tools, activating the move tool for example will select the position channels.
A general Auto Key workflow--
1.) Select the Camera and go to its Properties viewport.
2.) Click on the channel keying buttons for the six position and rotation channels. They should turn red.
3.) Activate the transform Move tool (W key) and move the camera.
4.) Activate the transform Rotate (E key) and rotate the Camera
5.) Move the time slider to a new time
6.) Move\rotate the Camera again
7.) Go to a new time...etc
Once those initial keys have been made you should not have to do any further manual keying unless you want to key the camera in place. This will also work when using viewport navigation to move the camera. This general overview should be enough information to get you up and animating. So, what are you waiting for? Get to it, and have fun.
* When working with Instances and Replicators, it is best to model the base mesh at the origin as all duplicated items will use that position as the transform origin when propagating duplicates. Of course, adjusting the Center position after the fact will remedy any peculiarities as well.

