
In modo deformers such as the 'Morph' deformer are added as Items. As you know, all Items have Channels and all Channels can be animated. So it is very straight forward to animate morphs! You merely need to add a Morph deformer to your Mesh item and then animate the Opacity channel (100% will produce the morph in full). You can add multiple deformers to a single mesh item. If you want to animate more than one morph target simply add as many Morph deformers as you wish. These deformers will naturally blend together so that all of your morphs can animate in concert with one another. To animate a morph deformer you simply need to add the deformer to a mesh item, choose the desired morph vertex map and then animate the Opacity setting.
 Morph Deformer
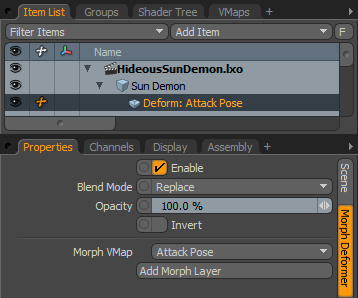
Enable: This toggle simply activates or deactivates the deformer. This is a quick way to turn off a morph temporarily. This can also be accomplished by toggling the eye icon in the visibility column of the item list.
Blend Mode: This popup choice has options for 'Replace', 'Add' or 'Multiply'. This dictates how the current Morph interacts with other deformer items on the same mesh. The default, 'Replace', simply writes over any other deformer beneath in the Item List. 'Add' and 'Multiply' are two blend mode options that either sum the deformation values or multiply them.
Opacity: This control allows users to modulate the strength of the deformer item. At 100%, this will produce the full effect of the morph. This can be particularly useful when you are blending multiple deformer items together.
Morph VMap: Use this option to select the particular Morph vertex map to apply to the geometry.
Add Morph Layer: Use this button to add additional morph deformers to the model.

