
The 'Environment Material' provides a simple method for adding a basic color or color gradient to the background of a scene as well as applying some atmospheric fog, if desired. Each scene file by default includes a single Environment item with an associated Environment Material. Additional material layers can be added to an Environment from within the Shader Tree viewport, by LMB-clicking the 'Add Layer' option of the full viewport window and selecting the 'Environment Material' item from the pop-up context menu. Any environment material, when combined with MODO's 'Global Illumination' functionality, will use the colors of the environemnt to illuminater the scene, producing an incredibly realistic lighting simulation. Please reference the 'Global Illumination' page of the documentation for information on enabling this function.
Layer--
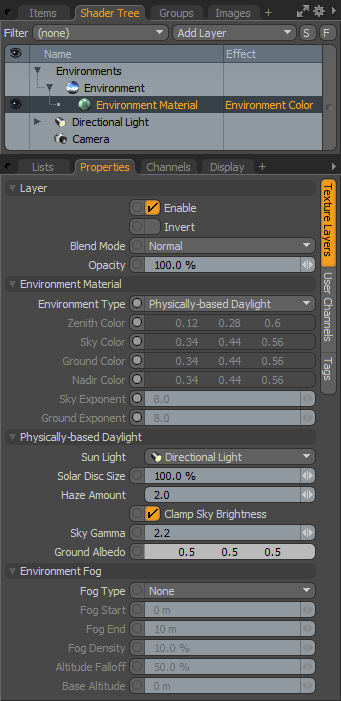 Enable:The 'Layer Enable' checkbox allows the user to temporarily enable/disable a layer without losing stored values. Disabled layers are saved with the scene file. This is the same as toggling the eye icon "
![]() " in the visibility column of the shader tree viewport.
" in the visibility column of the shader tree viewport.
Invert: This setting inverts any RGB color values specified in the Environment Material.
Blend Mode: Affects blending between material layers allowing the user to stack several layers for different effects. For more on blending, please reference the 'Blend Modes' page of the documentation.
Opacity: At 100% a layer is completely opaque, values below 100% change the transparency of the current material layer allowing other lower layers to become visible, ramping toward completely transparent at 0% essentially disabling the layer. If only one environment material is present, modifying the opacity will fade the brightness of the background and affect how much it contributes to global illumination.
Environment Material--
Environment Type: Within the 'Environment Type' drop down are several options for specifying colors and gradients that appear in the background of rendered images. Once selected, the appropriate options for Zenith, Sky Ground and Nadir colors are available as well as the Sky and Ground exponent values that adjust the bias of the gradients between the Zenith/Sky and Ground/Nadir respectively.
4 Color Gradient-- This easy to use gradient allows you to set 4 color values which are used to simulate the sky and ground. The Zenith color is the color that is directly overhead and this ramps into the Sky color which starts at the horizon and ramps upward. The Nadir color is directly below the camera and ramps upwards into the Ground color which terminates at the horizon when it meets the Sky color. There is a soft blend between the Zenith and Sky colors and a soft blend between Ground and Nadir. The boundary between Ground and Sky is hard edged to give the illusion of a distant horizon.
When using a 4 Color Gradient, the Sky and Ground Exponents are used to compress or expand the gradation between Zenith and Sky and the Nadir and Ground. Higher value push the gradient transition closer to the horizon, while lower values spread the gradient further across the available spectrum.
2 Color Gradient-- This option reduces the colors to Zenith and Nadir and creates a soft ramp between the two.
Constant-- Uses only the Zenith color for the entire background.
CIE Overcast Sky-- This option provides two user defined color values; Zenith and Nadir. The Nadir color will be used in without any ramp effect for everything below the horizon. The Zenith color starts directly above the camera and then has a slight ramp to a somewhat darker color. By definition the CIE overcast sky is three times brighter at the Zenith than it is at the horizon so the Zenith color will be reduced in brightness by that amount by the time it reaches the horizon. When this setting is applied with global illumination, you can recreate the traditional overcast render look popular in image that want to show off an untextured models surface detailing.
Physically-based Daylight-- The Physically based Daylight option works in tandem with global illumination to create renders lit by an incredibly realistic daylight simulation. Especially useful for architectural exterior and interior renders or in any scene that needs nice outdoor lighting. When this option is selected, the following 'Physically Based Daylight' option can be used to further control the simulation.
Physically-based Daylight--
When 'Physically-based Daylight' is selected as the Environment type, a few additional option are made available allowing the user to fine tune the look of the lighting simulation. Global Illumination needs to be enabled in order for the Physically-based Daylight function to work.
Sun Light: The' Sun Light' setting allows the user to set a distant light (other light types wont show up here) that will be considered the sun in the rendered images. Additional properties specific to the light itself are available in the Directional Lights 'Physical Sun' settings.
Solar Disc Size: A small disk is added to the rendered image, representative of the actual sun, above the horizon. It also appears in reflections, refractions and so forth. The default value of 100% is correct to the scale of what you would see in the real world, however, you can change the size depending on your particular scene needs using this setting.
Haze Amount: In the real world, as the sun nears the horizon, light has to pass through a greater amount of atmosphere to reach our eyes, additionally, moisture, dust and pollutants in the air (collectively described as Haze) further affect the light. The further the light has to pass through these particles, the more shorter wavelengths of light are absorbed, tending the light toward warmer hues. Increasing the 'Haze' setting in MODO will push the horizon colors toward oranges and yellows for midday lighting scenarios and deeper reads (sunsets) in evening times. Time of day can be controlled in the Distant Lights "Physical Sun' settings.
Clamp Sky Brightness: The Physically-based daylight function is a highly accurate lighting simulation generating light intensities outside of normal render display settings. The 'Clamp Sky Brightness' toggle will limit the overall brightness of the sky producing pleasing results more easily. When disabled, you might think your scene is completely 'blown out' and overexposed, but actually, since MODO renders in full floating point accuracy, you can bring back all that detail using a combination of white level, gamma and tone mapping. Please reference the 'Tone Mapping' page of the documentation for more information.
Sky Gamma: Adjusting gamma is the ability to adjust the overall contrast of a target in a non-linear fashion. The 'Sky Gamma' option allows the user to adjust the values of the procedurally generated Physically Based Sky lightening or darkening it for artistic refinement.
Ground Albedo: The 'Ground Albedo' option represents the color of any light reflected from the ground upwards in the overall environmental light simulation. Users can specify an appropriate scene specific color using the RGB color navigator. The Albedo is a color only, having no brightness in the calculation, so an RGB values between 0-1 (1-255) are the most appropriate value.
Environment Fog--
The Environment Fog option produces a simulated (non-volumetric) fog effect by applying the environment color to relevant materials with increased intensity as the geometry is further from the camera. This is also a great option to fade objects into a background, increasing the apparent depth (and likewise scale) of a scene. Fog can also be specified in the Shader item with similar options. The Environment Fog option differs in that it always uses the the environment color, where with the Shader Fog, any color can be specified. (click to enlarge samples)
 No Fog | 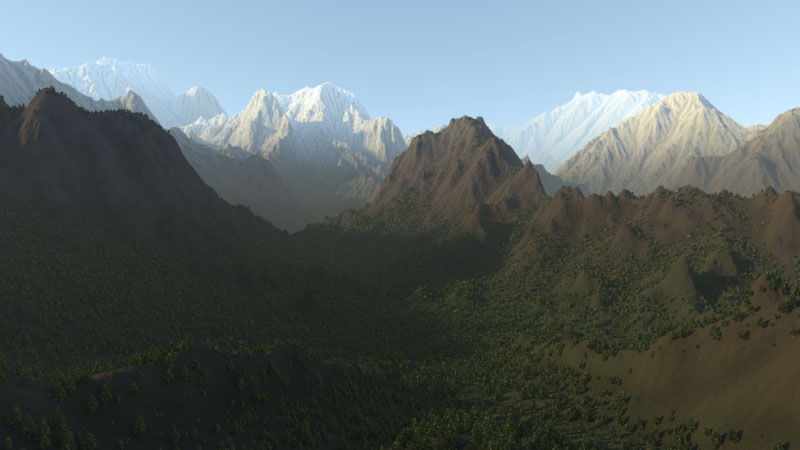 Linear Fog |  Exponential Fog | 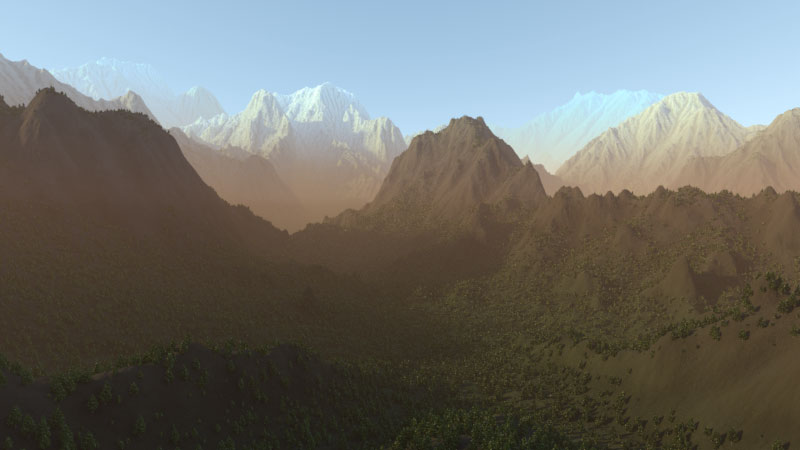 Underwater Fog | 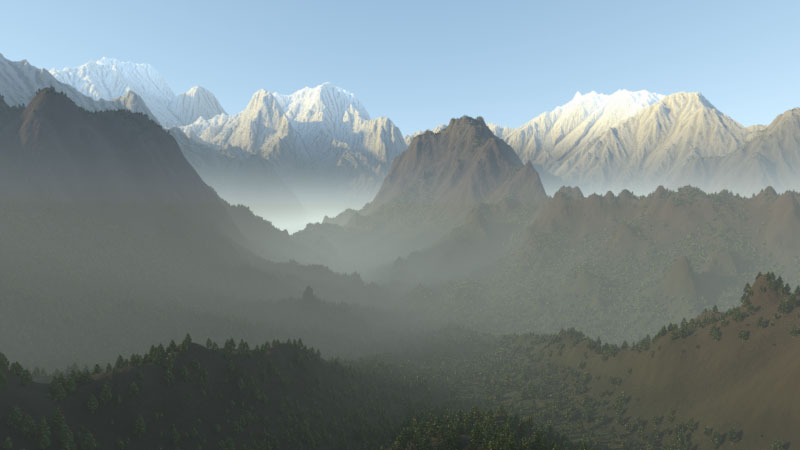 Layered Fog |
Fog Type: The Fog Type popup allows you to choose from the different fog types-
None- Disables Environment Fog from rendering.
Linear- When selected, Fog will render in the scene based on the Start and End distances, where there is no fog up to the starting distance, then surfaces will attenuate toward a solid Environment color and maximum Fog density at the end distance.
Exponential- When selected, Fog will render starting at the cameras position, increasing in strength the further a surface is from the camera. Based on exponential values, the strength will increase non-linearly and is directly influenced by the 'Fog Density' setting (so for very large scenes, you will want to use a very small value).
Underwater-
The 'Underwater' fog option is basically the same as the Exponential function, except that the fog will have a tendency to absorb the environment color more readily, producing an environment colored cast. It also reduces color saturation with distance. The example above is a late afternoon environment, so the reds of the setting sun influence the fog color. For a true underwater look, set the environment to a 2 or 4 color gradient with a blueish or teal color, or apply 'Shader' Fog and define the Fog color independent of the environment.
Layered- The 'Layered' fog option produces a ground fog like effect where the fog density increases with both depth and height.
Fog Start/End Distance: When the Fog type is set to Linear, users can specify specific starting and ending distances for the fog effect.
Fog Density: This percentage value determines how thick the fog is just in front of the camera. The default value of 10% indicates that geometry just in front of the camera will have a 10% blend of the fog color. The density of the fog will increase as it recedes further from the camera.
Altitude Falloff: The Altitude Falloff option determines the maximum height of the fog when using the 'Layered Fog' option. Fog will attenuate from the Base Altitude, fading from maximum density at the base to fully transparent at the defined Altitude Falloff value.
Base Altitude: Defines the bottom of the layered fog. Anything below will have fog applied up to the maximum density (based on distance to camera), and above this value will fully attenuate up to the Altitude Falloff.

