
If you've come this far, it's pretty likely you already have MODO up and running. Still, there is important information users should know regarding installation. This page will go through the complete installation procedure for your chosen platform. MODO is available for Macintosh, Windows and Linux operating systems and is available by download only; all platforms use a straight forward installer that takes care of the applications installation. Aside from specifying an install location, there's not too much to it.
Foundry User Account
Before you can install MODO, you first need to download it. MODO program downloads and licensing are facilitated through our Foundry community website. First and foremost you'll need an account there. If you purchased MODO directly from The Foundry, an account was created automatically during the purchase process. Use the same username and password you created when purchasing MODO to log-in and gain access to the various installer downloads.
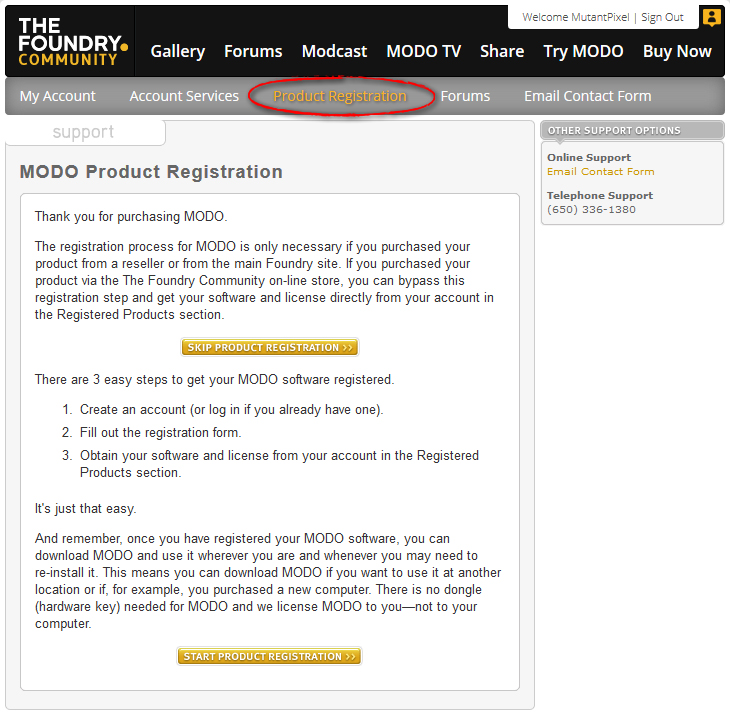
The product registration screen at community.TheFoundry.co.uk
 If you've purchased MODO from a reseller you'll need to create an account manually by visiting our website at community.thefoundry.co.uk and click on the 'Create Account' link in the upper right corner of the window. Once the account is created and you have received your 25 digit serial number from your reseller (e-mailed once the order process was completed, the timing of this varies by reseller), select the 'Product Registration' section (highlighted above). There you'll be presented with the above screen. You will need to click the 'Start Product Registration' button toward the bottom to continue.
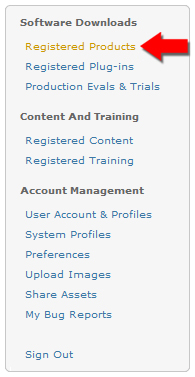
Once you've gone through the account creation and registration process, you can access installer downloads from the account console (pictured right). One thing to note is MODO uses multiple installers for a 'complete' installation, with the executable, one or more content files, plus a license file download (more on that in the licensing MODO section).
Once you have access to your console, click on the text that says 'Registered Products' to access the various downloads available to you. If you are returning to The Foundry website at a later time, you can always access your console by logging in and clicking your login name in the upper right hand corner of the screen.
Within the registered product panel, there are 3 sections for downloading, one to download the application itself located under 'Install Software' (Step 1), next is the 'Install Content' (Step 2) where you download the content installer, which is optional, but contains the various preset libraries as well as numerous free objects and scenes to help get you started. It is highly recommended you install the content unless you have severely limited drive space available. The third and final section is where you download the MODO license file (Step 3). By default, most browsers place these download into the system's 'Downloads' folder. For more info on the location of this folder, consult your operating system's documentation.

TIP: From time to time, The Foundry makes available service packs and other updates that you can access from either your user account or from the MODO menu bar "Help >> Check for Updates". Once downloaded, you can follow the same procedure outlined here to install. It is recommended you uninstall any previous version before initiating a new install (though backing up before uninstalling isn't a bad idea should something go wrong).
Installation Procedure for Windows
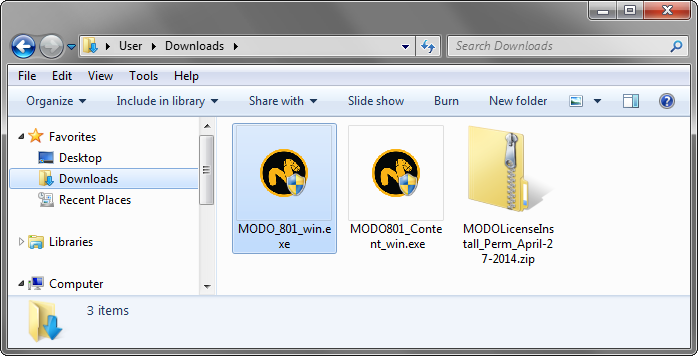
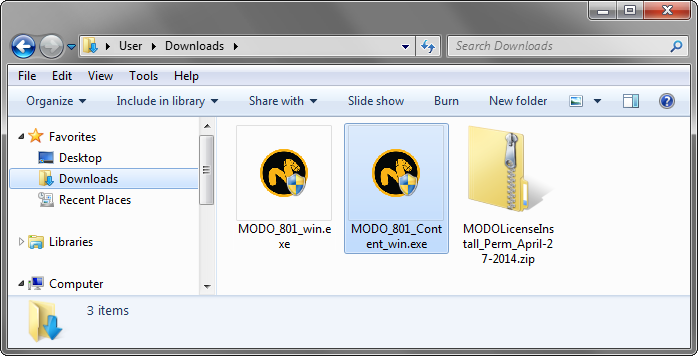
Once you've located your 'Downloads' folder, you can see the 3 files you just downloaded, in this case MODO 801 for Windows. Installation order is important so the content can find the installed application, so first you will need to double-click the MODO application executable file (.exe) to begin the installation procedure for MODO itself. You may get a pop-up requester asking if you want to allow the application to make changes to your system, click 'Yes' to continue. Immediately following, you will be presented with the InstallSheild Wizard screens-
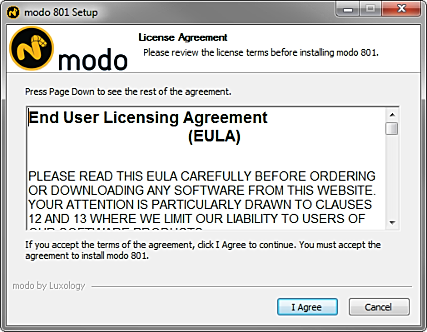
Screen 1 -First you'll be presented with the 'End User License Agreement' to continue select 'I Agree' to continue.
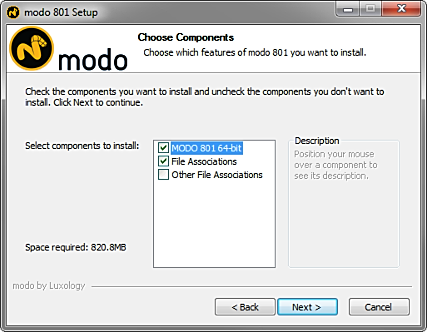
Screen 2 -The 64-bit version will be selected automatically. Then choose to define the file associations if desired. Click 'Next'.
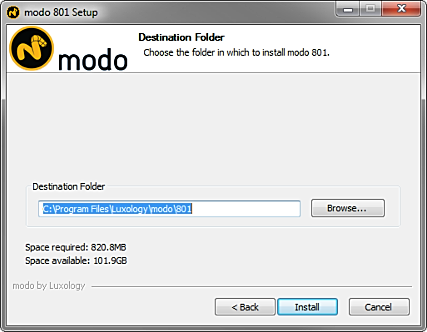
Screen 3 - Define the install location by clicking the 'Browse' button, then click 'Install' to initiate installation.
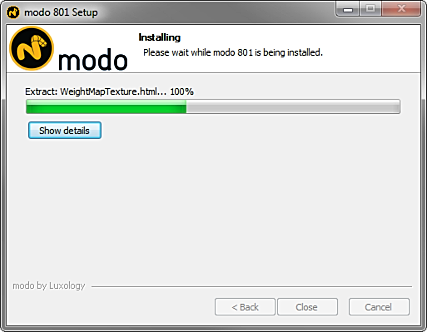
Screen 4 -The installer will start the install process, showing progress. When completed press 'Close' to dismiss the installer.
After the installation is complete, you can return to the downloads folder (Below) and RMB click on the Content file, double click this file to initiate the installation of the content. Follow the on-screen instructions to select the installation destination and click the 'Install' button to complete. For the 'License' files, select the 'Extract All' option from the RMB+click contextual menu. Accepting the defaults will extract the contents to an appropriately named sub-folder of the current folder.
Once finished you are done installing MODO, but it isn't ready just yet, see the Licensing MODO page to find out how to properly license your copy of MODO for use.
Installation Procedure for Macintosh OSX
Once you've located your 'Downloads' folder (shown below), you should find the three files, the DMG disc image file, the MODO content package and the folder containing the license file. (Note: If you are downloading with 'Safari', it's possible the installation will initiate automatically when the file transfer is complete.)

Double-click the 'MODO XXX_osx.dmg' file, a small window will pop-up verifying the image, followed by the licensing screen below.
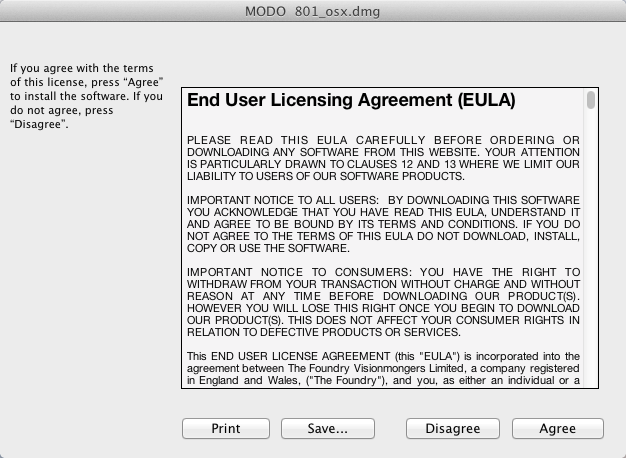
You may wish to save or print the 'License Agreement' from this screen. To continue with the installation, select the 'Agree' button, where you will be presented with the following installation screen.

To install MODO, one only needs simply to click+drag MODO onto the 'Applications' folder icon. Your system will scan the file and add it to the folder where it will be immediately available. Consult your user manual should you wish to add MODO to your 'Dock'.
Next you'll want to install the content, so return to the 'Downloads' folder and locate the MODO XXX Content package.
Double click the package to initiate the installation procedure and follow the on-screen instructions; choosing the appropriate install location. Once completed, you are done installing MODO, but it's still not quite ready for use, see the Licensing MODO page to find out how to properly license your copy of MODO.
Installation Procedure for Linux
Locate the the MODO_XXX_linux.run installation file downloaded from our site.
Extract MODO from the .run archive with the following terminal command, replacing [version number] with the current version:
sudo ./Modo[version number].run
The installer will display the End User Licensing Agreement (EULA) and prompts you to accept it before continuing.
If you agree with the EULA, enter 'y' and press 'Enter' to accept. (If you don’t agree with the EULA and press 'n' instead, the installation is canceled.) By default, MODO is installed in an appropriately named folder in the current working directory.
Once the installation has complete, you are finished. Navigate to the directory where MODO is installed and enter:
./MODO
MODO will launch and you will be prompted to license it, see the Licensing MODO page to find out how to properly license your copy of MODO.
TIP: Should you choose not to install the content, MODO will ask for its directory location each time you open the application. If you receive the error message "The Standard Content wasn't found. Some feature may not work properly without it. Would you like to visit The Foundry website to download it now?" You can disable this message by clicking the 'In the Future' button and selecting 'Always No' from the small popup menu.

