
To Work Plane Position: The 'Set To Work Plane Position' command is a powerful option allowing users to position and align 'Items', 'Centers' or 'Pivots' relative to the current Work Plane. With the Work Plane being a dynamic function, this might seem less than useful, however, nothing could be further from the truth. The true power of the Work Plane comes in being able to fix it to a specific location by way of a component selection and then applying the 'Align Work Plane' command. This essentially rotates the entire MODO universe to align with the selected element. With the Work Plane origin now centered on the selection, it makes aligning objects to specific positions very easy.
To best use this command, select one or more geometry components you wish to align to, such as vertices, edges or polygons, and use the 'Align Work Plane to Selection' command found in the Work Plane menu. This will fix the Work Plane in place, centered around the current selection, aligning it to match the normal direction of the selected elements. Next, select the Item you wish to move. This can be the item itself, or just the items Center or Pivot in their respective selection modes. Next, run the 'Set to Work Plane' command, this will move the selected element to the center (0,0,0) position of the current Work Plane. The Work Plane can then be reset to its normal operation using the 'Reset Work Plane' command or by pressing the 'End' key.
To Work Plane Rotation: The 'Set to Work Plane Rotation' command works in the same fashion as the 'Set to Work Plane Position' (detailed above) but will only affect the rotation of the selected Item, Center or Pivot, allowing users to match the rotation of an element without changing its position.
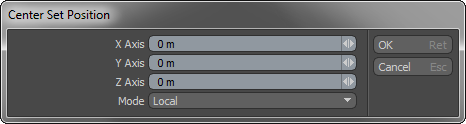
Position: The 'Position' popup requestor will allow the user to numerically set the position of an Item, Pivot, or Center in 3D space. Use the 'X', 'Y' and 'Z' values to define a specific location. Use the 'Mode' option to determine if the transform is 'Local' - offset from the items current position, or if it is 'World' - a specific position within MODO's universe.
Rotation: The 'Rotation' popup requestor will allow the user to numerically set the rotation an an Item, Pivot or Center in 3D space. Use the 'X', 'Y' and 'Z' values to define a specific rotation. Use the 'Mode' option to determine if the transform is 'Local' - offset from the items current rotation, or if it is 'World' - a specific rotation within MODO's universe.

Center to Pivot: All of MODO's animation transform values, by default, originate from the center position, if your model is set up to use pivots instead, the 'Center to Pivot' command will match the center position to the pivot position. Simply select the item in question (in 'Items' mode) and LMB+click the 'Center to Pivot' button.
Mirror Hierarchy: The 'Mirror Hierarchy' commands for each axis 'X', 'Y' or 'Z' allows users to mirror an entire hierarchy of items in a single click. Prior to mirroring, users will need to select the target element they wish to mirror. When selecting the root element, the entire hierarchy is cloned and its position mirrored across the desired axis. When selecting a target further down the hierarchy chain, only the selected element and its children are mirrored and remain parented to the same parent. Found in the 'Setup' interface layout, in the toolbox under the 'Setup' subtab, LMB+clicking the button will the invoke the command immediately mirroring the elements as directed. The interface button defaults to the 'X' axis, but RMB+clicking on the button opens the popup menu allowing the selection of alternate axes.
Mirror: The 'Mirror' command reflects the selected items over the chosen axis, either 'X', 'Y' or 'Z' producing a mirrored opposite item.

