
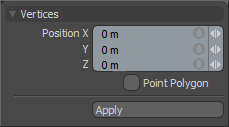
 Found in the 'Vertex' subtab of the modeling toolbox in modo, the Vertex tool can be used to quickly plot points in 3D space. To use the tool simply click the left mouse button on a 3D viewport to create a point under the mouse. One should notice that the point won't just draw anywhere in the viewport, but will draw where the mouse pointers position intersects the Work Plane. In a perspective viewport, changing the point of view can modify the Work Plane which in turn changes where points will be created. To change the position of the most recent point, either LMB+click directly on the current vertex and drag or hold down the 'Shift' key and drag anywhere in the 3D viewport. To numerically edit the most recently created point, you can change the X,Y, or Z values in the tools properties panel by adjusting the 'Position' attribute. The 'Point Polygon' option will generate single point polygons instead of regular vertices.
On their own, vertices won't render, but they can be useful in creating object positions when used as a point source for a 'Replicator' item or can be used as sources to create positions for 'Blobs', 'Sprites' and 'Volumes'. There are also some commands that complement the Vertex tool for making geometry-
Make Polygons--
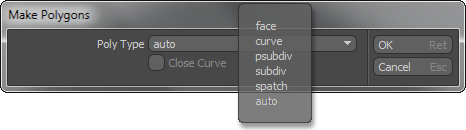
The 'Make Poly' command will use the currently selected vertices to create a polygon. The order in which the vertices were created (or selected) will determine the direction of the polygons normal. When run with an edge loop selection, a new polygon will be created from those edges and selection order is not important. This command can be triggered by pressing the 'P' key on the keyboard, or on the menu bar under under 'Geometry > Polygon > Make...' which offers several additional options --
Face-- Produces a regular polygon based on the drawn vertices.
Curve-- Generates a spline curve from the points with the additional option to 'Close Curve' joining the in and out vertices into a loop.
Psubdiv/Subdiv-- Generates a Pixar 'Catmull-Clark' Subdivision Surfaces polygon eliminating the need to toggle the newly created geometry manually.
Spatch-- Produces an spline patch curve for further patching, requires 3 or 4 vertices.
Auto-- The 'Auto' option matches the polygon type from a neighbor polygon connected to the selected vertex. If the selected vertices are floating, modo chooses the 'Face' polygon type.
Make Open Curve--
The 'Make Open Curve' command will use the currently selected vertices to generate an open spline curve. When using the 'Vertex Tool', the first drawn vertex determines the base of the curve. If created from a selection of vertices, the first vertex selected would then become the base. Determining the base of a curve is important for 'Fur Guides'. The command may be invoked by pressing the "Shift+O" keyboard shortcut, or from the Curve Palette available from the menu bar 'Geometry > Curve Palette'.
Make Closed Curve--
The 'Make Closed Curve' command will use the currently selected vertices to
generate a closed spline curve joining the first and last vertices into a continuous loop. The command may be invoked by pressing the "Ctrl+P" keyboard shortcut, or from the Curve Palette available from the menu bar 'Geometry > Curve Palette'.

TIP: Sometimes vertices may not be visible in the viewport until selected, this can be easily remedied by changing the visibility option. Hover the mouse pointer over the window you wish to modify visibility for and press the 'o' key, this opens the drawing and visibility options panel, toggle the 'Show Vertices' option under the 'Visibility' subtab to make them visible. This a per viewport setting.

