

The 'Contour Tool' will generate contours from user defined slices across an existing surface. The resulting contours can be curves, polygons or polylines (strings of 2 point polygons). The contours themselves represent the intersection of the slice across the target surface. There are a variety of uses for the resulting contours, but they will most often be combined with the 'Bridge' tool for the purposes of retopologizing a surface.
Usage
The 'Contour' tool is found in the Topo interface toolbox, as well as in the 'Mesh Edit' subtab of the modeling toolbox and in the menu bar under "Geometry > Slice >Contour". Prior to activating the tool, the target surface used to capture the contours from will need to be in the background (visible but unselected in the Items List), and the target mesh for the contours will need to be a selected Foreground layer. LMB+clicking the icon will activate the tool. Clicking and dragging in the viewport across an existing surface will generate the contour. The tools handle consists of a lavender line with two cyan squares at each end. Hovering the mouse over either will change them to yellow where clicking and dragging them will update the position of the contour (only the current active Contour slice can be edited.). Pressing and holding 'Shift' when clicking and dragging will create a new contour slice. It should be noted that Contour slices will project through the target based on the current view angle and orientation, so when slicing in a perspective view, the resulting contours will have perspective as well. A switch to one of the appropriate orthogonal viewports will keep the contour slices parallel. When the tool is active the following attributes appear in the tools property panel-
Contour--
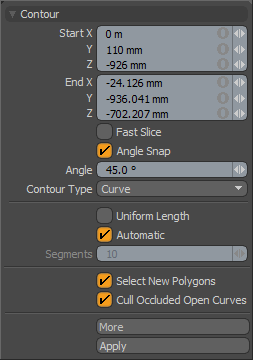 Start/End: These settings control the 'Start' and 'End' points of the slicing handle that creates the contour. Generally they will simply display their current position when interactively drawn in the 3D viewport, but users can also modify these values for greater accuracy, if desired.
Fast Slice: Contours are created interactively as the slice is drawn in the 3D viewport, on dense meshes this may slow the tool down. Enabling the 'Fast Slice' option will disable the interactive creation of the contour until the mouse button is released producing an increase in overall tool performance.
Angle Snap: The 'Angle Snap' option, when enabled, will snap the Contour slice handle to a user defined increment when the drawn line is close to the defined 'Angle' value.
Angle: Determines the snapping angle when the 'Angle Snap' option is enabled.
Contour Type: This option allows users to determine the type of Contour generated by the tool-
Lines- The 'Lines' option generates a chain of polylines (2 point polygons). These Lines can be selected both in Edges and Polygons modes.
Curve- The 'Curves' option generates a standard Curve that closely represents the target surface.
Face- This 'Face' option will always produce a closed polygon face whose edges represent the target surface.
Uniform Length: When the 'Uniform Length' option is enabled, the resulting vertex positions of the generated Contour will be evenly distributed along its length.
Automatic: When the 'Automatic' option is enabled vertex positions are determined by the Contour slices intersection with a polygon edge along the target surface. When disabled, the vertices are determined by the 'Segments' value.
Segments: When the 'Automatic' option is disabled, users can use the 'Segments' value to determine the number of vertices along the contour for the selected Contour type.
Select New Polygons: When this option is enabled any new geoemtry that is generated will also be selected. Dropping the tool will retain the selection so users can go directly to another function, such as the 'Bridge Tool' to connect the resulting curves.
Cull Occluded Open Curves:
More:

