
By default, any new material tag that is applied to a series of polygons receives a material item layer in the Shader Tree. Materials control the most common surface settings directly, such as diffuse color,
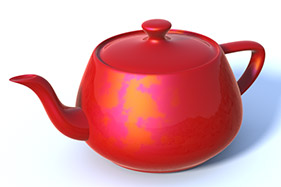
Anisotropy Direction--
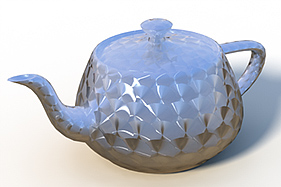
Even on very smooth surfaces, microscopic scratches will affect the way lights reflect across them; their affect is most apparent through the reflection and specular attributes drawing them out in a parallel direction to the scratches. Surfaces that are direction dependant are said to be anisotropic. It is especially apparent on machined surfaces such as brushed metals, but is also visible on many fabrics, such as silks and carbon fiber. Anisotropic maps require a special setup for proper results, if you wish to make your own Anisotropic maps, click here.
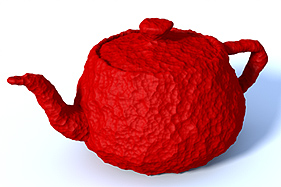
Bump--
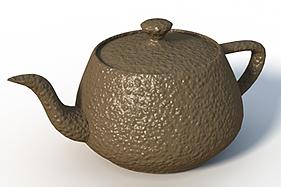
Bump maps are a means of simulating small surface details that would be difficult or impossible to model directly. They work similar to displacement maps, however they do not displace the geometric surface itself, only the rays that hit it, so in extreme cases this weakness is revealed on silhouette edges. Because of this fact, it is best to keep bump mapping to smaller details that wouldn't be noticeable at glancing angles. Their main advantage being, since bump maps do not require additional geometry, they render really fast. Bump maps require a grayscale image or any procedural layer. When color images are applies and set as 'Bump', only the images brightness (luminosity) is used.
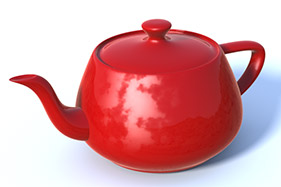
Clearcoat Amount--
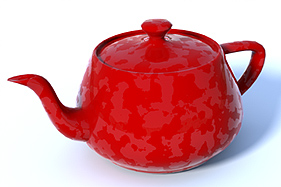
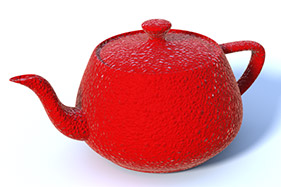
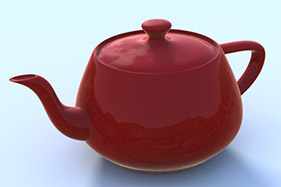
The 'Clearcoat' setting allows the user to easily add an additional unblurred and untinted reflective layer to a surface, simplifying the simulation of multiple layers of paint, especially automotive. When texture layers are set to this Effect, they control the amount of 'Clearcoat' across the surface. For the above example, a 'Noise' procedural texture was added with a high 'Gain' value making the result more apparent. When using Color image maps, only the brightness (luminosity) of the image will be used.
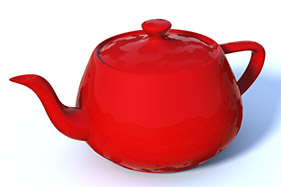
Diffuse Amount--
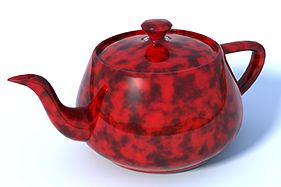
In the real world, all objects absorb certain wavelengths of light while reflecting others. The light that is reflected is what we see as the color of the object. The 'Diffuse Amount' acts as a multiplier with the 'Diffuse Color' setting representing how much of that light is reflected from the surface, when a texture layer is set to control 'Diffuse Amount', it appears to darken the color of the surface; the more light is absorbed, the darker the surface. Controlling the Diffuse Amount is especially important for reflective surfaces; reflections are an additive effect and would otherwise appear too bright. This can be done automatically by enabling the 'Conserve Energy' option of the 'Material Item' layer.
Displacement--
Displacement maps, like Bump maps, are a means to add detail to a surface. When utilizing the sculpting tools within modo, or an external application such as ZBrush™ or Mudbox™, Displacement maps can provide a much more organic method of modeling. Displacement maps utilize the micropolygon tessellation feature of modo to create additional geometry on subdivision surfaces models , moving the surface a given distance along its normal defined by the 'Displacement Distance' setting of the Material item, and the gray shades of the texture layer itself. The result is a model with greater surface detail and more organic form, that is easier to arrive at. Often times, a Displacement Map will have a gray middle ground and dark values will push the surface in and white values will push the surface out. This can be obtained by setting a inverse (negative) value for the 'Low' setting of the image map layers property, or by setting a negative value in a procedural texture.
Dissolve--

The Dissolve function is a means to fade out all surface settings together. 'Dissolve' is different from 'Transparency', which is an important distinction as Transparency does not affect additive surface effects, such as 'Specular' or 'Reflections' where 'Dissolve' does. When any texture layer is set as such, the black areas will by completely opaque attenuating toward white which would be completely transparent. When using Color image maps, only the brightness (luminosity) of the image will be used.
Driver A, B, C & D--
The driver function is a means to control a 'Gradient' layer using one or more texture layers set to the same drive letter (A,B,C or D). The values of the layer(s) are fed into any gradient item layer with a matching Input Parameter. Within the gradient, users may apply colors or values based along the values of the input textures. This option is useful in remapping the shades of an image map texture, or to achieve finer control beyond the 'Bias' and 'Gain' settings in any procedural texture.
Fur Root Bend--
When a texture layer is set to 'Fur Root Bend', the values will modulate the Fur Root Bend setting of the Fur item layer, which controls at what angle the fiber 'grows' from the polygon surface. Black values in the texture would equal 0% values in the property form attenuating toward white, which represents a 100% value.
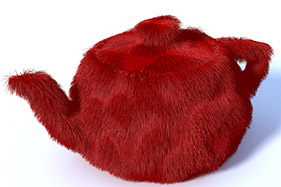
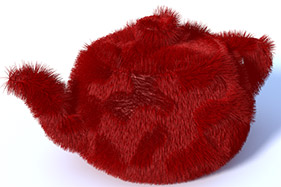
Fur Bump--
Generally, as fur grows, it bends toward the ground, which by default is negative Y (assuming this is the direction gravity pulls the fibers). The 'Fur Bump' setting provides users a means to control the 'Flex' direction for fur growth. Similar in function to 'Fur Direction', but where fur direction requires a 32bit image map for combing, Fur Bump angles the fiber direction similar to how a bump map perturbs the surface rays. This allows users the ability to use arbitrary texture layers, such as image maps and procedurals textures to control fur direction. The strength of the Fur Bump effect is controlled by the Fur items 'Fur Bump Amplitude' setting.
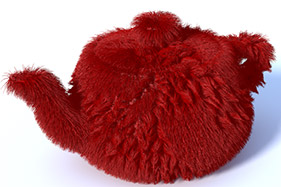
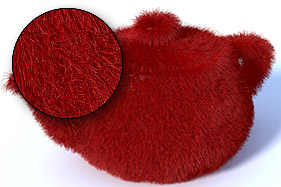
Fur Clump Density--
When a texture layer is set to 'Fur Clump Density', the values will modulate the Fur 'Clumps' setting of the Fur item layer, controlling the strength of how tightly clumps of fur gather together. Black values in the texture would equal 0% values in the property form attenuating toward white, which represents a 100% value. When using Color image maps, only the brightness (luminosity) of the image will be used.
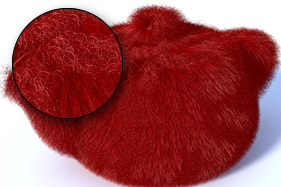
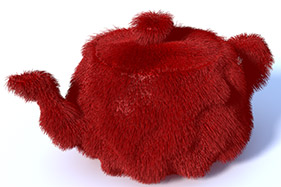
Fur Clumps--
When a texture layer is set to 'Fur Clumps', the values will modulate whether or not fur will clump together; clumped fur will use the strength value of the 'Clump' input field for clumping areas attenuating toward no clumping. The results of 'Clumps' and 'Clump Density' are similar, the subtle difference is that 'Clumps Density controls the strength of the clumping, and 'Clumps' controls whether or not a fiber clumps. Black values in the texture would equal no clumping attenuating toward white, which represents fully clumped fibers. When using Color image maps, only the brightness (luminosity) of the image will be used.
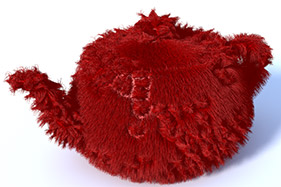
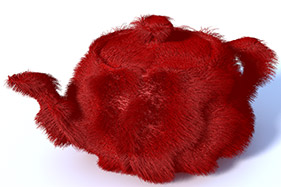
Fur Curls--
When a texture layer is set to 'Fur Curls', the values will modulate the Fur Curls setting of the Fur item layer which controls the strength of the corkscrew curls added to each individual fiber; it may require additional segments in order to properly render the curly fur. Black values in the texture would equal 0% values in the property form attenuating toward white, which represents a 100% value. When using Color image maps, only the brightness (luminosity) of the image will be used.
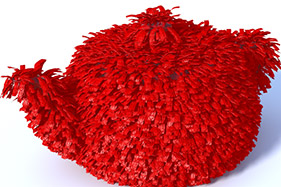
Fur Density--
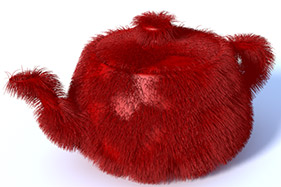
When a texture layer is set to 'Fur Density', the values will modulate the 'Render Density' setting of the Fur item layer which controls the thickness of the fur (number of fibers). Black values in the texture would equal 0% values in the property form attenuating toward white, which represents a 100% value. When using Color image maps, only the brightness (luminosity) of the image will be used.
Fur Direction--
Generally, as fur grows, it bends toward the ground, which by default is negative Y (assuming this is the direction gravity pulls the fibers). When a texture layer is set to 'Fur Direction', the values will control the 'Flex' direction of the Fur item layer. The 'Fur Direction' effect requires an 32bit HDR image format such as EXR, and works similar to 'Vector Displacement'. This type of image can be created quite easily in modo using the 'Add Fur Direction Texture' option. Once the basic image is created and applied, the styling tools of the 'Paint' tab can be used to control the direction of the fibers growth, independent of other settings. Make sure to check the 'Edit Fur Map' option of the styling tools when sculpting fur this way. To control both Growth Direction, and Length, use the 'Fur Vector' setting.
Fur Flex--
When a texture layer is set to 'Fur Flex', the values will modulate the 'Flex' setting of the Fur item layer controlling the amount of bend applied to individual fibers. Black values in the texture would equal 0% values in the property form attenuating toward white, which represents a 100% value. When using Color image maps, only the brightness (luminosity) of the image will be used.
Fur Growth Jitter--
When a texture layer is set to 'Fur Growth Jitter', the values will modulate the 'Growth Jitter' setting of the Fur item layer controlling how uniform or random fiber growth is. Black values in the texture would equal 0% values in the property form ramping toward white, which represents a 100% value.
Fur Length--
When a texture layer is set to 'Fur Length', the values will modulate the 'Length' setting of the Fur item layer as a percentage of the total length. Black values in the texture would equal no length attenuating toward white, which represents a 100% of the furs length setting. When using Color image maps, only the brightness (luminosity) of the image will be used.
Fur Vector--
There are 2 ways to style Fur surfaces in modo, guides are the most common as they are easy to visualize and control. 32bit HDR images can also be used as such, much like those meant for 'Vector Displacement'. Meant more for shorter fur type surfaces than longer styled hair, an HDR image can be applied to the shader tree and assigned the 'Fur Vector' effect. This type of image can be created quite easily in modo using the 'Add Fur Vector Texture' option. From there, users may use the
Styling tools of the Sculpting tab in the interface to control various properties of the fur interactively. Make sure to check the 'Edit Fur Map' option of the styling tools when sculpting fur this way.
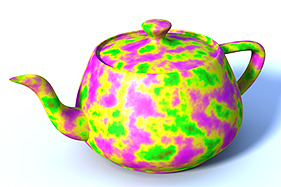
Group Mask--
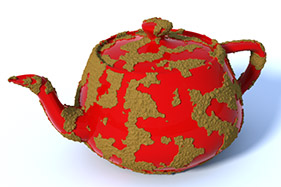
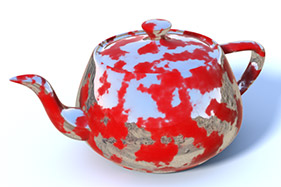
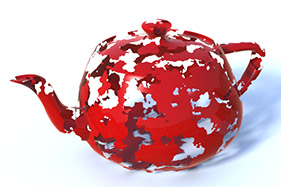
The 'Group Mask' layer effect makes it possible to mask the effect of all layers within a given Group Item. Due to the layered nature of the Shader Trees, this makes it possible to reveal any lower Shader Tree layers. Using multiple tags applied to multiple Group Items provides a means for producing some very interesting effects. The above effect is produced by masking a group item that contains a displacement layer and a gradient layer that simulates a muddy look.
Layer Mask--
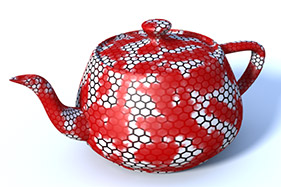
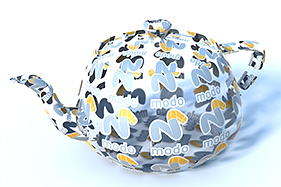
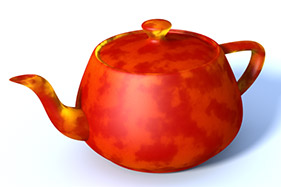
The 'Layer Mask' layer effect will mask the effect of any layer directly above it in the shader tree. Any texture or procedural layer can also be dropped onto another layer, automatically setting it as a layer mask. This makes it easy to individually mask the contribution of a single layer in the Shader Tree. The above effect was arrived at by adding a 'Grid' texture layer, masked by the 'Noise' procedural directly below it in the Shader Tree, set to 'Layer Mask'.
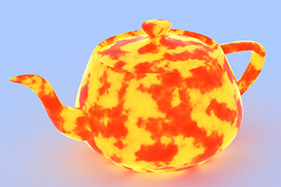
Luminous Amount--
When a texture layer is set to 'Luminous Amount', the values will modulate the 'Luminosity' setting of the Material item layer, controlling how much illumination will radiate from the surface (Illumination will only contribute to scene shading when 'Global Illumination' is enabled). Black values in the texture would equal 0% values in the property form attenuating toward white, which represents a 100% value. When using Color image maps, only the brightness (luminosity) of the image will be used.
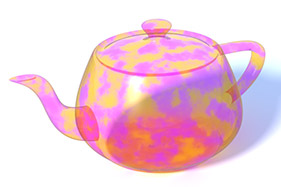
Luminous Color--
When a texture layer is set to 'Luminous Color', the values will control the 'Luminous Color' setting of the Material item layer, controlling the color of any illumination radiating from the surface (Illumination will only contribute to scene shading when 'Global Illumination' is enabled).
Normal--
When a texture layer is set to 'Normal', it will affect the shading normal of the surface, providing a means to simulate high resolution detail on low resolution polygon model. Normal maps are generally generated through a method called 'Baking', where surface detailing of a high resolution model is projected onto a lower resolution model, and the resulting image is mapped onto it so at render time the low resolution model will look much like the high res version at a much lower cost to processor use. This is a very popular method for generating geometry for realtime environments, such as games and simulations. In order for a Normal map to render properly, a UV map is required.
RGBA--
When a texture layer is set to 'RGBA' and an image with embedded transparency (such as a TGA or PNG file) is used, only the opaque areas of the image will be visible on the surface. All other areas of the surface will be invisible, including the associated attributes such as specular and reflections. This allows users to define both opacity for a surface and the diffuse color with a single texture layer. This is essentially the same as having an image for 'Diffuse Color' and then another Alpha image set to 'Stencil'. This effect is not appropriate when variable transparency is needed.
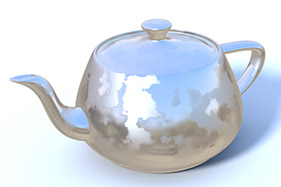
Reflection Amount--
When a texture layer is set to 'Reflection Amount', the values will modulate the 'Reflection Amount' setting of the Material item layer, controlling how reflective (mirrored) a surface is. Black values in the texture would equal 0% values in the property form attenuating toward white, which represents a 100% value. When using Color image maps, only the brightness (luminosity) of the image will be used. In the rendering process, reflections are an additive process, to avoid reflection from becoming too bright, it is necessary to reduce the 'Diffuse Amount' the inverse of the Reflective Amount, this can be done automatically when using the 'Conserve Energy' option of the Material item.
Reflection Color--
When a texture layer is set to 'Reflection Color', the values will control the 'Reflection Color' setting of the Material item layer, controlling the color of any reflective areas of a surface.
Reflection Fresnel--
When a texture layer is set to 'Reflection Fresnel', the values will control the 'Reflection Fresnel' setting of the Material item layer, controlling the amount of any glancing angle (fresnel) reflectivity. When using Color image maps, only the brightness (luminosity) of the image will be used.
Roughness--
When a texture layer is set to 'Roughness', the values will modulate the 'Roughness' setting of the Material item layer, controlling the apparent roughness of any surface specularity or reflectivity (when 'Blurry Reflection' is enabled). The rougher the surface, the more spread out specular highlight are simulating the look of microscopic bumps on a surface. Black values in the texture would equal 0% values in the property form attenuating toward white, which represents a 100% value. When using Color image maps, only the brightness (luminosity) of the image will be used.
Specular Amount--
When a texture layer is set to 'Specular Amount', the values will modulate the 'Specular Amount' setting of the Material item layer, controlling Specular reflection over a surface. Specularity is a simulation of a direct light sources reflection on a surface. Black values in the texture would equal 0% values in the property form attenuating toward white, which represents a 100% value. When using Color image maps, only the brightness (luminosity) of the image will be used.
Specular Color--
When a texture layer is set to 'Specular Color', the values will control the 'Specular Color' setting of the Material item layer, controlling the color of any specular reflections on a surface.
Specular Fresnel--
When a texture layer is set to 'Specular Fresnel', the values will control the 'Specular Fresnel' setting of the Material item layer, controlling the amount of any glancing angle (fresnel) specularity. Black values in the texture would equal 0% values in the property form attenuating toward white, which represents a 100% value. When using Color image maps, only the brightness (luminosity) of the image will be used.
Stencil--
The Stencil function is a means to truncate all surface settings together. 'Stencil' is different from 'Transparency', which is an important distinction as Transparency does not affect additive surface effects, such as 'Specular' or 'Reflections' where Stencil does. While the concept of Stencil is identical to 'Dissolve', Stencil does not allow for gray shades between black and while, so it always produces a hard edge, but is also much faster to compute, providing faster results when many transparent surfaces overlap, such as leaves in a tree.
Subsurface Amount--
When a texture layer is set to 'Subsurface Amount', the values will modulate the 'Subsurface Amount' setting of the Material item layer, controlling Subsurface scattering on a surface, the simulation of light bouncing around inside a surface before exiting. Black values in the texture would equal 0% values in the property form attenuating toward white, which represents a 100% value. When using Color image maps, only the brightness (luminosity) of the image will be used.
Subsurface Color--
When a texture layer is set to 'Subsurface Color', the values will control the 'Subsurface Color' setting of the Material item layer, controlling the color of any subsurface scattering on a surface.
Surface Particle Density--
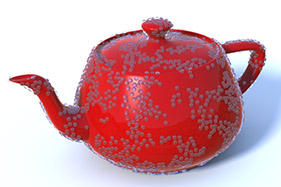
When utilizing 'Replicators' and 'Surface Generators' to clone duplicates of geometry over the surface of an object, say for making grass or water droplets, the 'Surface Particle Density' effect provides a means to procedurally control the distribution of replicas using a texture layer. The texture layer attenuates the total density as defined by the 'Minimum' and 'Average' spacing options of the 'Surface Generator'. where black values in the texture would equal 0% density attenuating toward white, which represents a 100% density. When using Color image maps, only the brightness (luminosity) of the image will be used.
Surface Particle Normal--
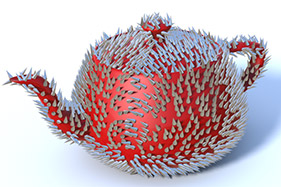
When utilizing 'Replicators' and 'Surface Generators' to clone duplicates of geometry over the surface of an object, say for making grass or water droplets, the 'Surface Particle Normal' effect provides a means to procedurally control the normal direction of replicas as an offset from the surface normal.
Surface Particle Size--
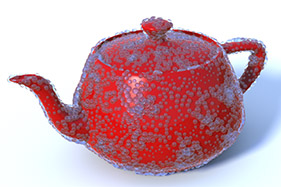
When utilizing 'Replicators' and 'Surface Generators' to clone duplicates of geometry over the surface of an object, say for making grass or water droplets, the 'Surface Particle Size' effect provides a means to procedurally control the scaling of replicas using a texture layer. The texture layer sizes the replica as a percentage of the default object size where black values in the texture would equal 0% scale attenuating toward white, which represents a 100% scale. When using Color image maps, only the brightness (luminosity) of the image will be used.
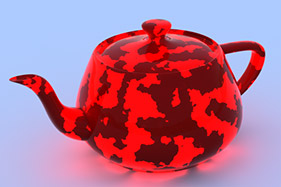
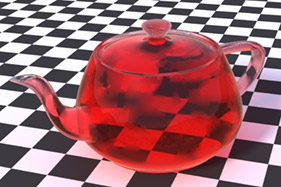
Transparent Amount--

When a texture layer is set to 'Transparent Amount', the values will modulate the 'Transparency' setting of the Material item layer, controlling how clear or see through a surface is. Black values in the texture would equal 0% values in the property form attenuating toward white, which represents a 100% value. When using Color image maps, only the brightness (luminosity) of the image will be used. It should be noted that Transparency does not remove additive effects such as Specularity and Reflectivity, in cases where this is necessary, the 'Dissolve' and 'Stencil' effects are better options.
Transparent Color--
When a texture layer is set to 'Transparent Color', the color values of the texture layer will modulate the Transparent Color setting of the surface. Some transparency will need to be present in order to see its effect on the surface. Using an image map texture would produce a result similar to a projector transparency slide where the image is clearly visible but completely transparent.
Refraction Roughness--
When a texture layer is set to 'Refraction Roughness', the values will modulate the Refraction Roughness setting of the Material item layer, controlling how sharp or blurry refractions are through transparent surfaces. Black values in the texture would equal 0% values in the property form attenuating toward white, which represents a 100% value. When using Color image maps, only the brightness (luminosity) of the image will be used.
Vector Displacement--
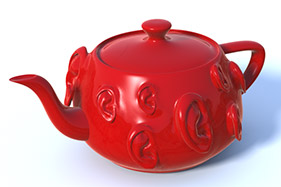
Vector Displacement is a function of modo that makes it possible to sculpt very highly detailed forms very simply. It is similar to displacement mapping that pushes micro polygons outward along their normal a given distance, but where displacements are only capable of moving a polygon a single forward direction, a vector displacement value can record all three directional values to the image map offering the ability to produce overhangs and undercuts to the sculpted surface. In order to store the necessary information, HDR image formats are required, such as EXR.

