
Network rendering in modo is designed to enable simple access to multiple machines across a home network or company wide intranet for rendering single images or sequences. Utilizing cross-platform Bonjour technology (developed by Apple and installed when you installed modo) the number of steps have been greatly reduced, eliminating the overhead usually associated with setting up network rendering. There are only three steps necessary when setting up a network rendering system.
1.) On both the host and any slave machines, you will need to identify a shared network directory.
2.) Enable "Use Network rendering" on the host machine.
3.) Activate "Slave mode" on any slave systems.
Of course, modo will need to be properly installed on all machines participating before proceeding (identical versions with identical build numbers are highly recommended! See 'Help > About modo' to check). For additional information on installation, please see the installing modo page of the documentation. Note that it is not necessary to install a license on systems being utilized as 'slaves'. Once activated, any render tasks on the host system will be automatically spread out across all available slaves.
Setting up Network Rendering
First, users will need to define a 'Network Shared Directory', which is any folder that is accessible for read and write operation from all systems participating. Please consult your operating system documentation for additional information on setting up shared directories and establishing proper permissions.
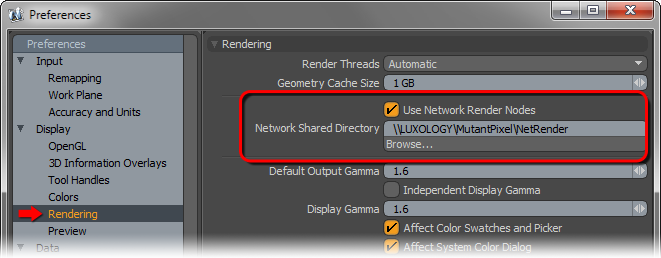
1. On the host and/or slave machine you can access this option from the 'Preferences panel'; use the menu bar to navigate to 'System>Preferences...'.

2. On the Preference panel (below), select the subsection on the left panel titled "Rendering". On the top right-hand side you will find the option for choosing the shared network drive. Use the browser to navigate to and choose the desired common directory. modo will use this directory as a temporary storage folder to pass assets to the render nodes. Also, make sure to activate "Use Network Render Nodes" on the host machine.
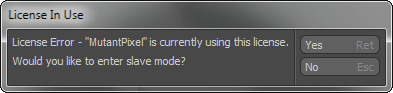
3a. In a single license environment, assuming the host machine is actively running modo; opening modo on a satellite system will present users with the dialog below warning that another system is currently running modo. Choose 'Yes' to enter 'Slave Mode' opening the 'Render Slave' window (Choosing 'No' will exit modo).
3b. In a multi license environment (multiple systems all with unique license files), users may specify the 'Network Shared Directory' in each systems 'Preferences'. Once specified, slave mode can be entered by the menu bar command 'Render > Enter Slave Mode' presenting the 'Render Slave' window.
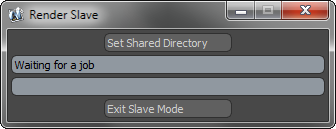
4. The 'Render Slave' window (below) has an option to set the 'Network Render Directory', if necessary (such as on a system with no license). Press ' Set Shared Directory' to open a system directory browse window, and navigate to the same shared directory as the host and press 'OK'. That's it, now when rendering frames on the host, modo will automatically utilize the extra CPU power on any slave systems (which show up as blue framed render buckets in the 'Render Display' window). Additionally, slave systems will see a small diagnostics texts displaying various status updates about the slave nodes operations.
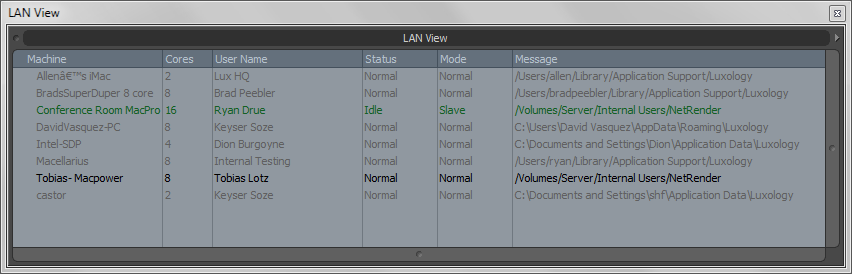
Users may also open a "LAN view" viewport window using the menu bar command "Render > Open LAN View". This window provides a top-level overview of all machines on the network running modo either in Slave or host mode. This viewport indicates the number of cores available on each machine, machine name, user name, mode, status and message. Further, you can tell if a machine is connected to your active host by the color of the text. Green text indicates that the machine is connected and ready for rendering. Black indicates systems that are connected, but not enabled as slaves. Any other color indicates a problem with the connection or availability.

TIP: Macintosh systems do not automatically connect to network drives during boot, make sure to properly mount any external drives when network rendering before activating a render command on the host system..

