
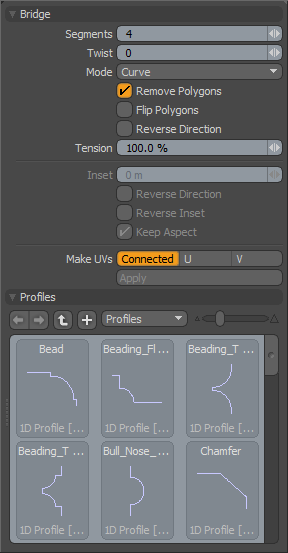
The Bridge tool will create polygons to bridge the area between selected edges or polygons. There are several options for the Bridge tool including the number of segments, a twist amount, interpolation mode (Linear, Curve, Smooth), and options to remove the original polygons and/or flip the new polygons. The resulting polygons can also be modulated by selecting a profile.
 Bridge--
Segments: The segments option allows you to set the number of polygons that are created to the bridge. This value can be set interactively by dragging in the 3D viewport while the tool is active, or numerically on the tool properties form.
Twist: The twist value is used when bridging polygon selections. When the value is set to a non-zero number it will turn the bridge polygons between the original connection points. This is very useful in cleaning up bridges between disparate polygon selections where the bridge can become overlapped. In that case using the Twist value will often allow you to "untangle" the bridge manually.
Mode (Linear, Curve, Smooth): This popup provides a simple method for setting the interpolation style of the generated bridge polygons. Linear will create a bridge in a straight line between the original selection. Curve will create an arc between the original selection points. Smooth creates an "ease in/ease out" blend between the original selection sections.
Remove Polygons: This will remove the originally selected polygons used to create the bridge. This is on by default and is the most often preferred behavior.
Flip Polygons: When activated this option will flip the normals of the newly created polygons in the bridge.
Reverse Direction: When enabled, modo will reverse the direction of the bridge.
Tension: This percentage value provides some additional control over the bridge path used when the Curve mode is active. Increasing this value will accentuate the curved effect and decreasing it will mute the effect toward the linear path.
Inset: Specifies the X direction offset amount of 1D profile.
Reverse Direction: If this option is enabled, the 1D profile is evaluated from top to bottom.
Reverse Inset: If this option is enabled, "Inset" will be reversed essentially mirroring the profile.
Keep Aspect: Automatically sets the "Inset" value based on the aspect ratio of the profile.
Profiles--
Mini Preset browser for viewing various profiles. Works the same as the standard preset browser.

